Saturday 25 July 2020

Up for more? oh well go on then...

As lockdown has been easing and I have been venturing out just that little bit more, it was a nice surprise to get a message from my cuz David asking if I fancied a socially distanced ride out on Friday. 

I think David had seen my previous blog about heading out for a ride with John on Monday, when we went up to Smiddy Shore and back and as we haven't seen one another in Oh I would say 6 months it was a lovely opportunity to catch up.


Getting my gear sorted and heading up to my Uncle Dave's where I was to meet David didn't take long at all.  A tap on Uncle Dave's door and our David came to greet me, he then went to retrieve his bike from his car. Just then my Uncle Dave came to the door, it was smashing to see him and have a bit banter, as again I haven't seen my Uncle Dave in months due to this stupid virus.

A quick discussion on what route to take and we were off, leaving from Anfield Plain. I suggested going down on the C2C as far as Tanfield Lea Industrial estate, then cutting through the estate to the East Tanfield Railway path. From there we could ride along to the Causey Arch and eventually to Sunnyside. So this is what we did. No pics of David as he doesn't like his photo taken LoL

Once we reached Sunnyside I led the way across the road and showed David a back road and trail which leads partly across country and eventually comes out at the what I think is called "The Woodsman's Arms", anyhoo it's on the road towards Whickham.

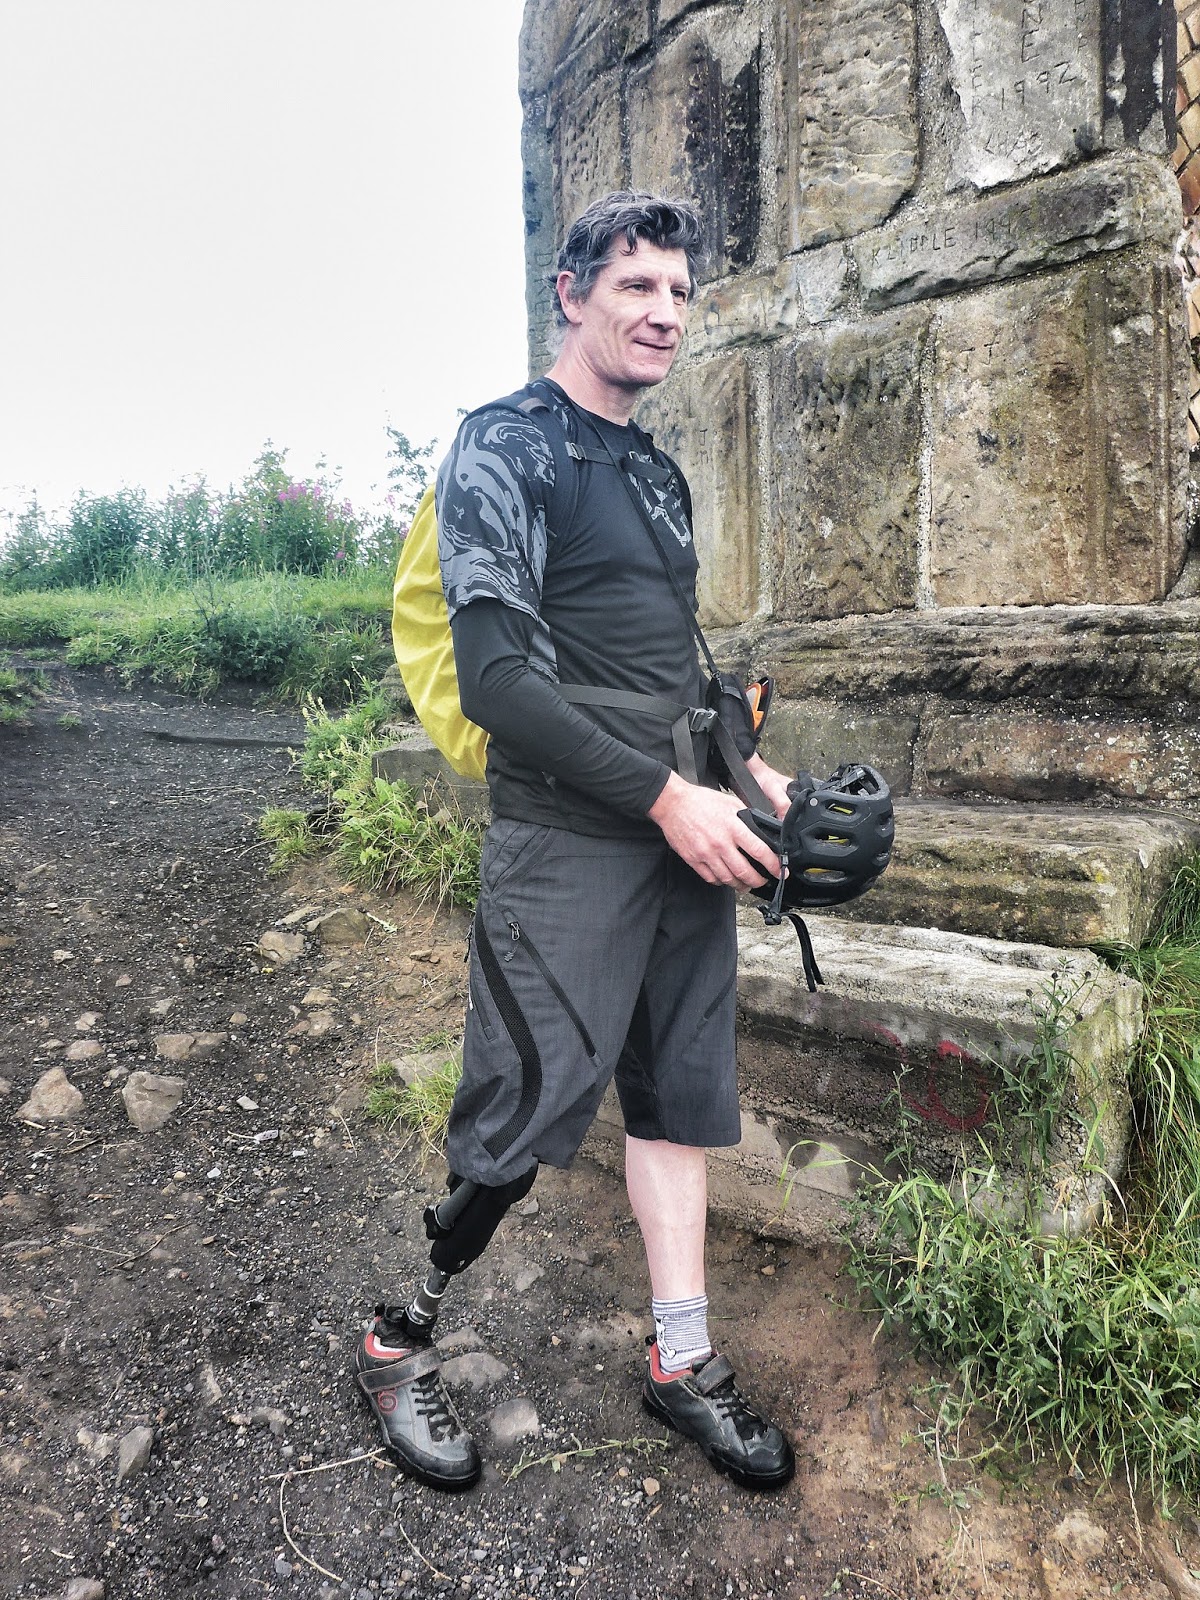
The field behind me looked so pretty with the poppies scattered around
Very Scenic
Heading down the steep bank past Whickham Golf Club, we eventually came to a turning on our right which again led us on an off-road trail, this trail leads down what is known as Clockburn Lonnen, it's great riding down, but if you ever have to climb back up, not so much so.

Once at the bottom of this trail, you are pretty much onto the Derwent Walk and this was part of our planned route.

Riding along the Derwent Walk towards Rowlands Gill and eventually Consett, for anyone that knows the route, well they will tell you the climb is rather deceiving. It is an uphill battle all the way and can be quite exhausting.

Just as we approached the small road section of Rowlands Gill, turning down past Maguires Fish and chip shop and Gibside Country Park I felt a "twang" and when I looked down was gutted to see that my brand new Bartlett Tendon had snapped. Rather than whine on and moan about it I just asked David to take a few snaps, so that I could send them off to show Brian the designer of my knee the problem.

Awwww Man
No, it's not supposed to look like that
Back on the Cycle path, we continued on. The day was simply glorious, not too hot and stifling, but again not too cold. As we rode up towards Consett and Blackhill we noticed quite a few folk out and about, everyone was really pleasant and the majority said "hello". As we stopped briefly to take on some water at one of the viaducts a gentleman was approaching us with his dog. The man was carrying a waste bag and had one of those "grabbers" you know the sort for picking up stuff. I got chatting to him and he explained he didn't live far away "Just down at the station" I think he said. Anyhoo he explained he kept this particular piece of the path, as much as he could clean and tidy.  He was a very friendly chap and I think a worthwhile mention in my blog, not only because he was doing a selfless act, but also because he took an interest and had the time of day to be polite. That reminds me I must be more forward and ask for peoples names for when or if I give them a mention.

Soon we were back cycling away. I think it must be some time since David had been down this way, as he mentioned that he didn't recall what a long drag the path was. I mentioned that if he thought back to the old days when we were kids and where the railways ran from, so for example where we were from New Kyo near the Morrison Busty and at one time David lived just yon side of Consett Steel Works, well the tugs had to come all the way right up from the Tyne. Both Stanley and Consett are pretty high above sea level. I always remember my dad telling me that it took a tug and a shunter to control the fully laden coal and ore containers as the track was so steep.

Eventually at Blackhill, then there was a little climb up towards Tesco, once past here the ride back to Anfield Plain wasn't too bad.  As we got back to Uncle Dave's I said my goodbyes and rode back home, in total I had covered 32 miles. Not a bad little outing, all done on Eco mode on my Specialized Turbo Levo on about 15% assistance.

Moving on to Saturday...

After Fridays ride out and actually feeling decidedly ropey from getting up till going to bed, with a tummy that felt like an inflated football I wasn't exactly sure if I was up for a ride out on Saturday with John.

John had asked me on Monday did I fancy a ride to the coast and back and I warned him "It's not the going there, it's the coming back". Anyhoo late Saturday night John messaged me saying he was up for a ride to the coast. Now in hindsight, I am wondering had John had one too many cans late Friday evening, as man when he rocked up this morning he looked a bit rough, "errrr Sorry John, but you did"

John should have known he would struggle with a ride to the coast from the off, the telling sign was when we had got less than a mile heading up the farmer's trail and he commented "I can't remember this being so hard", at least I think that was what he was referring too I didn't look back just in case.


Farmers Trail
Anyhoo I am not going to write the whole route, other than to say we went down the C2C following Route 7 and eventually got to Sunderland. 


Kings Head on the C2C, his crown used to twirl in the wind and make a cool noise
John thinking about his bottom I bet
Me looking a bit pasty
Me
Johns pic of me at the mariner
By the time we had got to Souter lighthouse, I had lost count of how many times John had informed me about his annihilated bottom. 


So where exactly does it hurt?

John says my hair just looks windswept
We stopped briefly along the coastal path for a bite to eat and to take on some water and as usual had a bit of a laugh and shared some good craic.
Lovely ride along the coastal path
We then made a plan to ride down into South Shields and stop off at the park where the little steam train runs and take another small break.

Whilst we were in the park I asked John which way he fancied going home as we had a few options. He replied he wasn't too bothered as at that point his ass was broke anyhoo, plus no matter which way we went there was a climb.

I suggested we could try and find the pedestrian tunnel, as I knew it was now re-opened. This would take us under the Tyne so that we were on the Newcastle side and from there we could ride along the Quayside and eventually head up through Watergate Park and Sunnyside to get home. John agreed to this so after having something to eat and drink we set off again in search of the Pedestrian Tunnel.

As we headed towards the Port of Tyne it didn't take us long to discover signposts directing us to the Pedestrian Tunnel, which were heading towards Jarrow.

A little bit of history about the Pedestrian Tunnel which goes between Howdon and Jarrow connecting the North of Tyneside to the South. Information taken from http://www.tynepedestrianandcyclisttunnels.co.uk/ where you can discover more interesting things.

"Construction of the Tunnels began in 1947. Two shafts were sunk, one on each bank, before the connecting Tunnels, were excavated by miners operating in compressed air.

The Tunnels were opened on 24th July 1951 by Transport Minister Alfred Barnes.

They were part of the North East’s contribution to the Festival of Britain, and built at a cost of £833,000. the Tyne Pedestrian and Cyclist Tunnels for years provided a safe and reliable way for thousands of workers to cross the river to work in the shipyards and factories that then lined the Tyne.
At their peak, around 20,000 people used the Tunnels every day. By the time the Tunnels closed for refurbishment in 2013, that had dropped to 20,000 per month.

The number of users declined as Tyneside’s industrial profile changed and the first vehicle Tyne Tunnel opened nearby in 1967, car ownership grew and lifestyles changed.

By the early 2000s, the Pedestrian and Cyclist Tunnels were in a poor state of repair. The harsh underground conditions and general wear and tear led to frequent breakdowns of the escalators and vertical lifts. The costs of repairs spiralled.

In an effort to guarantee the future of the Tunnels, there was a successful application to have them listed as a structure of special historical interest. They were granted Grade II listed status in May 2000.

The then Tunnels’ owner, the Tyne and Wear Integrated Transport Authority decided that to revive the Tunnels as a safe, reliable means of crossing the river, a complete refurbishment was necessary. The Tunnels closed in May 2013 and re-opened on 7th August 2019".

Soon we were at the building where you can gain access to the tunnel. There was no one else there so no one to ask about how to go about getting in. As we stepped further into this building we saw that there was an area closed off. I thought this was some sort of....Errr I don't know what I thought it was, maybe some sort of transportation device to get you to the bottom of the tunnel, but not a lift. Anyhoo upon getting to the top of the escalator...dear me, it was a long way down. I mean like a LONG WAY DOWN and proper steep. Nothing else for it John and I began walking our bikes down this geet long set of stairs.


The tunnel

That is one long set of stairs
Oooh Errr, wish there was a lift... OH there is
Let's Go


See there is a lift
 We eventually made it to the bottom and just as we did these other folk came along on their bikes from the other side of the tunnel. I think they were playing around down there and going around and around in a loop. John and I pedalled down the tunnel on the bike side and as we got to the other side, guess what... A geet big set of escalators going back up. Words that came to mind were For F@%Ks Sake. Just then these lads came back around and we asked was this the only way out, to which one of them replied: "you do know there are lifts at either end". Well I just looked at John and he looked at me, then this guy laughed and said: "you didn't carry your bikes down the escalators did you?" "Of course not mate do I look stupid" LOL

Well, that was quite the adventure. The signage said 7 miles to Newcastle and the Quayside from this side of the tunnel. Man, it was one hell of a 7-mile ride, felt never-ending.

Yay eventually in the Toon and heading along the Quayside on the Gateshead side. Another slightly longer break at the Dunston Staithes as at this point I thought John may start crying about his broken bottom. I cheered him up somewhat by reminiscing about the story of his "Bastard Fish", apparently this is a recognised fish, well in John's world. It is a fish that goes around eating other prized fish and is so greedy it ends up choking on its prey. Personally, I would just call it a greedy fish, but John is adamant it's a Bastard.

It was great to see John proper belly laughing, memories of days out with your pals are some of the best, even when things don't go according to plan. Oooh, I almost forgot John was also quite chuffed in that I rode through some dog shit, which flicked up off my tyre and went up my back apparently. John saying I'm pleased it's your turn, as normally he has to retrieve a poos stick to solve his crap problems. Well, you know what they say "shit for luck", maybe I will win the lottery tonight.

I am so glad I was on my Ebike, massive respect to John I don't think I could have made it home without a little electrical assist. The final push coming home from the bottom of Lobley Hill, up into Watergate Park and Sunnyside is pure torture. Poor John was wrecked, his new bike having only 11 gears and not the usual "granny ring". So coming up the steep banks there was some walking involved.

Once back to the Tanfield Railway track it wasn't too bad, we just came along over the Causey SArch and the back trail towards Tanfield Industrial estate, then from there up to the C2C and taking the route up Barn Hill and Station Bank at the back of the Indoor Market. I used Turbo mode and flew up the bank. Have to admit my old ass was starting to ache a few miles back too.

Into Stanley, down to John's and said "Bye Bye" then straight home. Total ride 50.16 miles. A quick Whatsapp to a mate in Australia, put my gear away and then into my bedroom to carry out my exercises as its a core and arms day today, yeah I am a glutton for punishment. Got to tone this tummy and get rid of these love handles I mean I don't need them I am not in love.

The end off to nurse my butt.

Monday 20 July 2020

A Socially Distanced Ride Out

        I have now been off work almost 6 months, initially feeling unwell at the start of February with yet another cold, leading to a chest infection and then Covid hit around March and I found myself being socially isolated in line with the government's guidelines for people assessed as being at a clinically higher risk.
 

During my time off I have not been sitting idle, far from it. In fact, my health and fitness regime, including my changed diet back in December of 2019 has continued and I now find myself on day 255 of cycling every day. The majority of this has been indoors upon my Turbo Trainer and road bike. 


Social distancing
A good few weeks back when the lockdown had eased somewhat I decided to head out on my bike and unfortunately over the course of 2 days, managed to snap 3 tendons which fit onto my Bartlett Tendon Knee. Rather than not use my knee I removed the cams and just decided to keep active cycling indoors. As well as cycling I have been also doing some core work and as much as I can with the pair of 15kg dumbbells I have. I am kind of limited for space in my bedroom for any more gear. Anyhoo it has kept me ticking over and I quite look forward to building up a sweat.

I bought a Fitbit a good few weeks ago and I think this has also helped maintain my enthusiasm as I can view various things upon the app and it gives me something to work towards.

Ooh and with being off I have also found more time to read. I have finished a number of books including the Unabombers Manifesto, and interesting read, but for a super-intelligent guy I just did not get his point or methodology.

I also have just finished a fantastic collective book of works by Neville Goddard. After reading Neville's work I am now trying to use his teachings to manifest amazing stuff into my life.

At the moment I am a couple of chapters into Alexandre Dumas and the Count of Monte Cristo. Wow this book so far is enthralling. I was even recounting the story to John as we went out for a ride, so a bit like Jackanory but on bikes. Not entirely sure how much attention John was taking as at one point he asked was I talking about Romans LoL


Anyhoo to today's adventure. Out the blue last night, my mate John messaged me asking how I was doing. John went on to say he had this week off and was I ok and up for a ride out. "Yeah sure" I replied as it has been ages since I have seen John and now as far as I am aware it is safe to venture out as long as you social distance. I mean I think this is correct, but who knows as the government just doesn't seem to be able to make it's mind up and is already preparing for the next wave.


Sorry, this is all over the place...Going back to the BTK Crossover I feel very fortunate to have received brand new cams and tendons from Brian Bartlett to try and remedy my snapped tendons. I am currently using what is classed as a G2 knee and there is a newer G3 knee now out. As I am no longer sponsored or supported, and prosthetic provision is very, very expensive I just feel really lucky to be able to use my current knee and get out and about. So at the moment, I have a sort of "Hybrid" Knee a mixture of old and new components.


BTK G2 Chassis and G3 Cams and Tendons appear to work
Today was the first time fitting the new components and initially, I didn't think they were going to work. I soon discovered they would, it was just that I was still half asleep this morning when fitting them and had forgotten to place the retaining "grenade" like pins in place into each of the cams. It's been so long since I used the knee for mountain biking it just completely slipped my mind. Anyhoo early morning panic over the knee once set up was spot on. I don't usually use the flexion wedge, however, Brian recommended popping it in as the G3 tendons are slightly longer when used with the G2 chassis and the wedge prevents a sharp tug on the tendons when going through flexion to extension.


Gear all packed just about John arrived down at my house at around 10:30 AM and we set off. Our plan was to venture up to Waskerley and have a little spot of bait at Smiddy Shore reservoir, before riding back.


As we rode from my house heading over to South Moor and heading up the "Black Path" John was in front. Now I am pretty much blind as a bat these days. I had popped my Oakley shades on as I knew there would be lots of flys about, and they knack when you get them hitting you in the eyes.  Anyhoo I don't know how I spotted it, but there on the very side of the narrow overgrown pavement was what I thought was a very small hedgehog. I immediately stopped as I had almost ran the poor little thing over and got off my bike shouting for John to wait as I did so. John came back just as I was taking my backpack off and going in my pack I recovered my gloves which I had packed just in case. I popped my gloves on and picked up this wee little, what looked like a baby hedgehog.


Aww poor wee Hog
Wee Hog started to come to life

Now I don't know much about hedgehogs, what time of year they should be out, how big they should be etc etc, but this little guy looked very small. I knew my friends Michelle and Lee quite often got them in their secluded garden so I rang Michelle to ask her advice. After speaking to Michelle, all the while holding this little hog, who was all balled up I waited for Michelle to text me the number for the Hedgehog Hotel over at Dipton. Apparently, it's a place that looks after hedgehogs and gets them ready to go back into the wild.


And so I rang the Hedgehog place, unfortunately
, there was no reply, both John and I were unsure what to do at this point. I then rang my son Kyle to see if he could come over with a shoebox and pick up the little fella, thinking  I could maybe contact the hedgehog people later when I got back from my ride. Just then the little hedgehog started moving a lot more in my hand, opening his/her eyes and seeming a lot more energetic, compared to when I originally picked him/her off the pavement. Maybe it was the warmth of my hands as I held it. 

How cute is this little Hedgehog?
After a quick discussion with John, we decided maybe the little fella would be ok in the thicker undergrowth at the side of the pavement, which led into a safer wooded area. So I stepped over what used to be a fence and placed the little guy way back from the path. As I stepped back onto the pavement and as we listened carefully we could juts say here the little hog making its way through the brush.
 

Now I don't know about you, but for me no matter how old I get coming across a wild animal is so exciting, especially having the opportunity to actually hold it and look at the details of how beautiful and in this case how so very cute it was.
 

After that small encounter, we carried on our ride with me every now and again saying to John "Eeee I hope that little Hedgehog is ok". By the time we got to Smiddy Shore John said "are you still thinking of that hedgehog, you are aren't you"

 
Smiddy Shore

Maintaining Social Distancing
It was canny windy up at Smiddy Shore so we took shelter around the side of an old building while we ate the bits and bobs of stuff we had brought. A few pic later and it was time to head back, the return journey being a much easier ride.


John with his new Marin mtb

Man even though I have been riding some 255 days I can tell there is a huge difference between being "cammed" up and using tendons, compared to just riding without them on the turbo. Proper enjoyed the ride out even if I was knackered and it was great to catch up with John.


Me
I took my Specialized Turbo Levo today. I have been messing around with the Mission Control App and tuning the engine. I was quite surprised when I got back and checked my stats. Covering just under 30 miles I only used 12% battery, which I think is rather good. I rode the whole way there and back with only 10% assist on Eco mode. I reckon this just about covers the energy loss from being an above knee amputee, as whilst the bike does offer some assistance, it is by no means doing all of the work.

Saturday 27 June 2020

Myrtle continues to fight us all the way...

My last post about my wee 1965 VW Beetle Myrtle was back in April, man it feels so long ago and in that time it doesn't actually feel as if my dad and I have actually gotten much further along, however my bank account certainly tells a different story.

No matter what we have done trying to move forward it has been a case of one step forward, then encounter a new related problem and about 5 steps back.

We have run into so many things that I can't possibly recall them all. So although this sounds like a negative story, full of doom and gloom I do have to say and make clear that for me personally, I do still love my wee Bug, and like anything in life, she is a work in progress.

Myrtle is around 55 years old and with adding new bits and bobs to her she was always going to require some kind of modifications. 


Let's start with her suspension, something we have really struggled to get right. So after finally thinking we had everything sorted, a new steering box fitted to remove all the excess play in the old box. A quick steer kit added and the track rods fitted the correct way up. The front shockers in position on the shock locators which are welded in place onto Cage 66 Fabrications extended trailing arms. A homemade steering stop (something I may change at a later date just for aesthetics, even though you cannot really see it and it works) Everything looked spot on.

Home designed steering stop

My dad and I had the fuel tank out so we could peer under the bonnet and see the steering components and shockers etc. Upon airing Myrtle up she was still struggling to lift her driver's side front, even with a lot more psi in that side, so she always looks to be leaning. We re-adjusted the front trailing arms, making sure they were not bolted up too tight and also re-greased the new 4" narrowed beam. Things appeared a little better. Then we went to lower Myrtle, fully airing her out. Now upon measuring her from the driver's to the passenger side, the driver's side was 20mmm lower than the passenger side. Upon closer inspection, it became evident that the track rod was tight up against the body, at the inner wheel arch. This required a little modification to cut a notch. I admit I had to step away at this point as my dad whipped out his reciprocating gizmo and began cutting the inner panel. Job done we tidied the area up as best we could and it doesn't look too bad. At least Myrtle can sit aired out and she is not catching anywhere on the front.


When lowered track rod hitting the inner arch

To avoid the fuel tank catching on the steering bits and pieces I also ordered a really neat tank raise from Eva Resto. A brilliant bit of kit, raising my tank 35mm and with channels down either side, so the wiring can sit neatly nestled away.

Tank sitting on Eva Resto Tank Raise
Next on the agenda was to get Myrtle's wiring sorted. Now, this wasn't a job we were ever going to tackle really, but after a lot of consideration and during working on Myrtle finding a few burnt wires I asked my dad "how big a job is it? and do you think "WE" as in...ahem! Ern, can we do it ourselves". You see I am useless when it comes to most things, but especially wiring, I don't even know how to wire a plug up...well I mean they come pre-fitted now anyhoo.
 

Much research was done upon the interwebs at this point and I eventually came across a guy who I discovered had a really good reputation and knew his stuff. Yes, the wiring was going to cost a little more than I first thought, however after speaking to Iain Burns over at Aircooled Auto Elec the complete loom he could make up and provide became a no brainer.

Aircooled Auto Elec Top Quality and Iain Burns Topman

20 Blade fuse box, now everything is isolated and independent
Iain was spot on and our communications both over the phone and using Whatsapp within a few days resulted in me having a modern 20 Blade Fuse Box, complete with custom wiring loom that had everything included to run all my electrical needs. So things like my dual compressors and ECU for my Air Ride set- up. Safety relay for my electric fuel pump. Separate power for my soon to be fitted auto clutch adaption. A spur for our modified electric wiper switch. Oh and also included within the loom a plug with accompanying wires for an alarm system I had purchased. There was even an accessory USB that I can fit in my glovebox.

I removed a spare toggle switch from under the dash and made a bracket for the alarm LED

Alarm LED which is super bright
Wiring so much neater
Rear-end a lot neater thanks to the wiring loom
Iain integrated the alarm wiring into the loom
Ern testing plug when he went to fit the alarm
One problem we did encounter upon fitting the 20 blade Fuse box was that the fuse box was not accessible when the Air Ride Cradle was in place, so we had to modify the cradle somewhat.

This area covered the new fuse box

Once trimmed we can now access the fuses when installed
Anyhoo I have to give a huge shout out to Iain as he went out of his way to help us throughout the fitting of the new loom and the loom itself is top-notch pure quality. The icing on the cake for me was when I actually got to have a working interior light, as this was one of my first purchases believe it or not when I bought Myrtle over a year ago and started this journey.


Well chuffed with interior light
Again doing a lot of research I had originally planned on fitting LED Headlights to Myrtle. However, upon reading about the cheaper lights available upon the likes of Amazon and eBay I discovered that although they can look pretty cool, the cheaper Chinese made lights throw off terrible beam patterns. Apparently, it's all to do with where the "hot spot" of the light is produced.

So I decided to opt for replacing the headlight and sidelight bulbs themselves and found some replacement LED bulbs over at Classic Car LEDs.  This meant I could retain my old classic reflectors and light housing. I have to say I am impressed with the brighter light, far better than the old yellow dull candle-like glow. I also have some nice shiny stainless steel headlight surrounds to go on as the old chrome ones look a bit pitted.

LED Headlight Bulbs
Installed, proper easy job
Bulbs
LED's all around

Loving the much brighter rear LED's
As mentioned earlier we had the fuel tank removed from Myrtle and it was at this point whilst trying to find somewhere to place the alarm siren Ern decided he didn't like the look of the old brake pipes and the way they were routed. So he decided he was going to remove them. We had taken the Compressors and manifold out upon the air ride cradle to finish off the wiring so this was the ideal time to replace the brake pipes at this point.


New brake pipes installed along with Eva Resto Tank Raise
Upon removing the pipes, my dad having to cut them, we tried our best to mop up and wash off any brake fluid, however, it was inevitable some would get on my paintwork. Some paint was already flaking in the area where the brake fluid reservoir is situated on the inner wing. I came down the next morning after my dad had fitted the new pipes and discovered a large area of flaked and blistered paint. It looked bloody awful. So the next couple of days were spent trying to do a spot repair under the bonnet. Myrtle is never going to be a show winner, but the repair looks ok and at least it should protect her. To be fair she now looks better than before as like I say her paint was blistered in a similar area.


Not too bad a spot repair
Upon removing and then replacing the fuel tank and the inline fuel filter, and the pipes from brake reservoir some fluid must have spilt and have gotten on my small alarm siren as the dam plastic bracket snapped clean off. This meant I had to go Googling for a new Alarm Siren and we decided to mount it in a different position out the way. I now have a new funky sounding alarm sound.

Myrtle's wiring all complete and everything working. Ern fitted a small micro switch to the internal wiper switch so that when the plunger was pressed it would contact and the new electric wiper pump would activate and in turn spray water onto Myrtle's screen. A cool little mod which keeps the original appearance of the car. I saw the idea for the mod on the Samba Forums. Mind you Ern did mislay the small plunger and I was gutted that a new one cost me almost £20 inc p+p

Inside Myrtle is practically gutted. I had bought some interior ply door card templates from eBay. I think they were about £40, they are about 3mm thick and a right pain in the arse to get clipped in. I am hoping when the time comes to get Myrtle's interior trimming done these will help out. Her old cards must have got wet at some point and they were looking a bit worse for wear.


Hopefully can trim these as they are thicker than standard cards.
Myrtle already had some soundproofing inside, but I decided to buy a soundproofing kit from Car Insulation.co.uk I got a full classic Beetle kit and also bought some Large Sheets of PeaceMAT XR Car Sound Deadening Material. I have since placed in the PeaceMat, selecting areas to give me good coverage combing the old deadening material with the new. Once I finally decide on what my rug options are I can sort out the rest of the soundproofing kit I got which looks to be good stuff.
     
Pretty easy to apply this sound deadening

A lot of Myrtle pre-covered so just filling in areas
In reality, having Myrtle to tinker on with has been great during the lockdown, it's filled in a great deal of time for both my dad and myself.

A Little Rat Fink Action
Ern had been looking for little jobs to be getting on with. I found him just last week replacing the fuel line and in making a heat shield to protect the line from where it comes out of the electric fuel pump. The pump being situated on the rear axle. The fuel line appears quite close to my passenger side J Tube.

Whoever had Myrtle in a previous life did a great job in making a removable panel over her gearbox. it just makes getting to the starter and rear of the engine area and top of the gearbox so much easier.


It really helps to have this removable panel

New Fuel line in, Ern has made a heat shield, not in picture as the fuel line is close to J Tube
I had always had a plan to do a front disc conversion on Myrtle so ordered up a CB Performance front brake conversion kit from Limebug. This included all the necessary parts and I opted for the kit with the 2 1/2" dropped spindles. 

Myrtle already has dropped spindles fitted, but my thinking in looking at the CB Performace versions is that the brake callipers actually look to mount directly to the spindles, rather than a separate bracket that goes onto the beam. I may be wrong here as I just went off online images. 

Upon further reading about the brake disc conversion, I discovered that the hubs/rotors come pre-installed with studs. So what this would mean is having wheel nuts on the front and wheel bolts to the rear. I really wanted everything to be the same so it was at this point I started looking around for press in studs to put into the rear drums. I will get back to that bit in a moment.


As Myrtle was starting to take shape, her wiring looking all nice and neat, plus I had also tidied up her engine bay, having bought a new pulley tin and having it modified at a local metal fabricator to fill in a small hole (something only the eagle-eyed and purists will spot I am guessing) Then, of course, painting it Dolphin Grey to match the other tinware.

I would really have liked to remove the engine and get all new tinware, getting rid of the fan shroud heater pipes etc. But hey that's maybe for the future. We also fitted a new Crank Pulley bolt as the one that came with the MST kit kept coming undone. Oh and whilst I am talking about the back end of Myrtle upon going to start her a couple of weeks ago it appears her electronic ignition had just decided to die, so we have had to resort to going back to points for the time being.

Saying which I have a brand new Magnaspark II Billet Distributor, new 8mm HT leads and a Magnaspark coil. I am just awaiting a fuel block off cover with integrated coil mount to arrive from Aircooled Hut.

New Tin seal and engine area looking pretty clean

Just awaiting Fuel Pump Block-off and coil mount.
I figured the time had now come to get some new wheels. Now as we all know wheels are a major decision on a car, they can make or break a car. And again you have guessed it a whole lot of research. I just could not find a set of 17" inch wheels that came in anything but 7" inches wide. Now I knew 17"' s would fit as I had seen them online on other peoples cars, however, this is the fatal mistake many of us make. It is not so much that they will fit, it is how do you make them fit. I can tell you now from personal experience it can be a very expensive and frustrating process, one I am going through at the moment, as I will explain. 

JBW 7.0x17 SMA Wheels
So I firstly got my eye on a lovely set of 7.0 x 17 Radars. I had seen a Bug in the FastCar magazine and it looked sweet. Upon reading about the car it stated the guy was running a 4" narrowed beam. "Great," I thought the same as me. I then read that the wheels apparently were 7.5 inches wide, this couldn't be right as far as I was aware they only came in a 7" wide fitment on a 17. Not only that this guy who was some sort of an engineer with all the gear and know-how had actually narrowed his wheels to get the best fitment.

I then got my eyes on another Bug online at Volxzone. Upon reading about this car the guy had the 7.0x17 JBW SMA wheels, but he was running a 6" narrowed beam. I have just recently bought and had fitted a 4" beam so this really wasn't a route I wanted to go down, and this is where no matter how much research you do when you want something and start imagining it in your head you make stupid decisions.

So this is what was going on inside my head "Oh I'll just order some 7.0x17's JBW SMA's. I know I'll pop 185 tyres on the front, they are bound to fit". And so I spoke to a very helpful gentleman named David over at R&R Alloys. David went through the process of measuring for poke and offset to check for clearance. He was spot on in his communications and even though the JBW SMA wheels were not advertised upon his website he managed to get both the wheels and tyres in stock within about a week. 

Just a note as these wheels were not a standard size fitment that is the reason I have encountered problems. David and R&R Alloys were spot on and a real pleasure to do business with. They were very helpful and something I  really appreciated was there was no sales pressure. That for me is very important in any dealings. I hate it when you call somewhere and are made to feel like just another punter. Once I get things sorted I have promised to get back in touch with David as he took a genuine interest in Myrtle.

I am guessing you may have an inkling as to what happened next. Yes, it was that "Dun, dun dun" moment, as I excitedly unboxed my brand spanking, amazing looking wheels. Myrtle was up on axle stands, aired out so her rear suspension was at it's maximum for height. I went to put one of the new wheels on the rear, placing it up against the drum and "Errrr what", it wouldn't sit straight. On closer inspection, the rim was actually hitting the rear bump stop. Bloody hell, nowt ever just fits.

I came back in the house and began searching to see if other people had experienced this problem. Sure enough, as Myrtle is a 65 with short axles I was going to need 1" spacers, obviously I had not researched enough. So onto Limebugs page and a couple of spacers ordered. Oh and this is where I also go back to the wheel studs.


So with having to fit a 1" wheel spacer, plus the wheel and then take into consideration the length of how much the stud would go into the drum, my dad and I had to measure everything. It turned out that a press in stud would fit approx 9mm into the drum. The spacer was 25mm or 1" inch and the wheel itself at the hub is also 25mm, so that was 65mm in total approximately.
 

Checking the internet Honda studs appeared as if the would fit. They are 12mm with a 1.5mm threaded pitch and the knurled area is just about spot on. I ordered 10 of these Evo Corse Spline Wheel Hub Stud M12X1,5 67mm For Honda from Motorsport-Tools.com.

Again more research on The Samba Forums and my dad ordered a 10.20 mm drill bit. Once everything had arrived including new wheel nuts from John Brown Wheels, we set about drilling the drums and my dad took the drums and studs over to a local garage who were kind enough to allow him to use their press to press in the studs.

 
Once the spacers arrived from Limebug we again test fitted one of the rear wheels, which was fitted with 205/40/17 tyre. This time the wheel went on no problem, with just enough clearance. You have to remember that actually, Myrtle would probably never be at her maximum suspension range, as we still had he on axle stands and her rear suspension hanging freely. What we then did was pop a jack under her rear suspension on the side we were working on and jacked it up as if Myrtle was being lowered, so pushing the wheel up into her inner arch. The wheel/tyre eventually caught the inner body, as I would expect, however, this would be in a position when she was sitting pretty low when fully aired out. So it looks like we had sorted the rear end.

Moving onto the front end and so the nightmare that is cars and wheels began.
I may as well just say from the off 7.0 x 17's on a 4" narrowed beam running either 185/35/17 or 205/40/17's and air ride do not fit. 


Oh and another side note for me I absolutely hated the look of the 185/35/17 on the 7" wide rim. Obviously, the tyre was stretched, something that totally went over my head when I ordered the setup. By this I mean the outside edge of the alloy rim was protruding somewhat all the way around. I know some people like the look, but for me it's a Big fat NO.  

Many people have commented and said this fitment actually works, but I think when they are comparing one car to another it is where one car is statically lowered and a choice is made between being low enough for clearance and looks. Whereas a car that is on air which has the potential to go much lower, if you run the wrong setup it kind of defeats the point of having air ride on in the first place. 

Now I am obviously not a professional in this so just speaking from my own experience. If you read this it may help you if you are thinking of going down this route. What I would say is do a lot of research and if at all possible borrow wheels off one of your mates to do a test fit. As I am socially inept and have no friends I have no one to call upon so I have to rely on spending huge amounts of money and learn by making mistakes.

Loving the look of the SMA's on the back
Gutted front wheels don't fit

SMA's retain a classic look
Ok so with the wheel on the front, when turning full lock to the Left the tyre was catching the pan of the car just where the inner wheel arch is and upon turning hard-Left the rim/tyre was catching the front beam, just about where the trailing arms attach...

We even tried popping the 1" inch spacer on the front, this helped with the catching of the pan and beam, the wheel just say catching the beam on full lock, however upon going to air Myrtle out with her now having a much wider track the new wheels/tyres ended up being pressed hard up against the outer edges of the front wings. I couldn't actually air her all the way out otherwise it may have ripped her wings off or at least bent and damaged them.

Next thought "Omg, omg, omg" followed by a string of obscenities, followed closely by putting all wheels away, going upstairs to my room, throwing my leg off and taking refuge under my duvet. Hey, we all react in different ways.


After a stressful and frustrating few hours of hiding, I eventually emerged to discuss options with good Ole Ern. Although my dad and I can sometimes go hammer and tongs at one another, I know he always has my best interests at heart. We kind of agreed at this point it's not a money thing as I mean I have chucked so much at this little car over the last year just quitting isn't even an option.

So plan of attack we figured I had 3 options.

First... sell brand new wheels second hand and take a loss and just run her with standard steels which was not the vision I had for Myrtle.

Second... chance buying a 6" narrowed beam which would cost me another £850 or so, then remove the 4" beam and try and sell it second hand. This option requires a lot of work, plus no guarantees and after reading about 6" beams and steering kind of put me off.

Third... and something I had investigated even before I had bought these wheels, get the wheels narrowed professionally.

And I think I am going to end there and will add another update when we have solved this latest problem

PS anyone want to but some Nankang NS-20 185/35/17's brand new with labels still attached?