Showing posts with label Myrtle. Show all posts

Sunday 21 March 2021

Mini Adventure in Wee Myrtle my 65 Bug

 Decided to have a bit of a spontaneous adventure in Myrtle this morning, well I think it was morning as to be fair it could have been partly afternoon, my body clock is all over the shop.

I gathered some gear, my new GoPro Hero 9, my DSLR camera and I asked Ern, did he fancy a little jaunt out to which he replied " No you are alright, take your phone, just in case", no faith in the wee car Huh Ern?

Anyhoo Ern changed his mind, and we grabbed wor coats and the gear taking them to put in Myrtle. I then discovered I had completely forgot how to use my GoPro, so had to quickly pop back in the house, checkout a short YouTube vid for instructions, and then we were ready.

I started Myrtle up and let her warm up a little, she started first click. I checked her air ride pressures, just in case she had lost any air. I also checked to make sure the semi auto clutch was in auto mode, you can tell if it is as a little light lights up just under the throttle pedal.


I gently popped her into first gear, with a little revs and proceeded to stall her immediately. It kind of takes a bit getting used to this new fangled mod. I didn't want to rev the pods off Myrtle, as I was worried I would shoot out of our backyard and across the road, so I was trying to be gentle on the accelerator. After another couple of attempts, stalling her each time, it could be to do with her not being warmed up I managed to pull her out of our yard and headed for the first challenge, the bloody great big speed humps in our back lane. I hate these things, they are massive. Even with 90 psi in the front and 80 psi in the rear I can hear Myrtle scrape over the humps.

Myrtle 65 VW Bug
Clutch system is pretty unobtrusive

We managed to negotiate the humps and I turned onto Durham Road and headed up the bank. I managed to change gear quite smoothly, again it's just about figuring out how to drive the system. There are a few small things to iron out, and I have been in touch with Bewick Mobility, where I had the adaption fitted about improving the setup.

Oh whilst I remember for anyone wanting this kind of adaption it is quite expensive. I didn't know about a thing called Access to Work, it's a government scheme for people with disabilities. It's setup to help people with their jobs, so that can be as in my case getting too and from work, or it can be for other work related things, like training or equipment. It is just a handy thing to know, and it is easy to apply. You get an adviser who deals with your application, and it's pretty straight forward. In my case as I work part-time, 4 days per week I had to pay a certain amount towards the cost of my adaption, but it still saved me a lot, and to be fair I didn't mind, after all it has enabled me to drive my little car.

Glenn & Myrtle VW Beetle 65
Myrtle looks tiny

Ern with Myrtle

Back to Bewick Mobility and the small problems I am encountering. It's things like loosing all drive at certain moments, this requires me to pop my hand over the gearstick sensor to re-engage the clutch, or like if I let off the accelerator as I am coming down a hill, again the car loses drive, so I have no engine braking. I have noticed when I approach lets say a roundabout, and I am braking either to negotiate it or slow down for other users that the system disengages/engages depends on how you look at it, and the car will just rev, instead of driving, so if you imagine as a normal driver, it's as if you are dipping your clutch and just coasting whilst in gear. The car uses a computer which is tuned to the car's rpm. The motor which operates the clutch is neatly hidden under Myrtles back seat. I think once she is setup, this will be a great bit of kit.

Ern looking over the moor, they were burning back the heather

We had a drive up to Wakerley and up on the moors, Myrtle whilst she certainly isn't fast, she is only a 1200 cc, she did pull up all the rather steep banks well and got us to our destination.

I shot a little video of me driving her, showing the gear change and when we got up on the moors took a few photos.

Myrtle VW Beetle 65
Myrtle VW Beetle 65


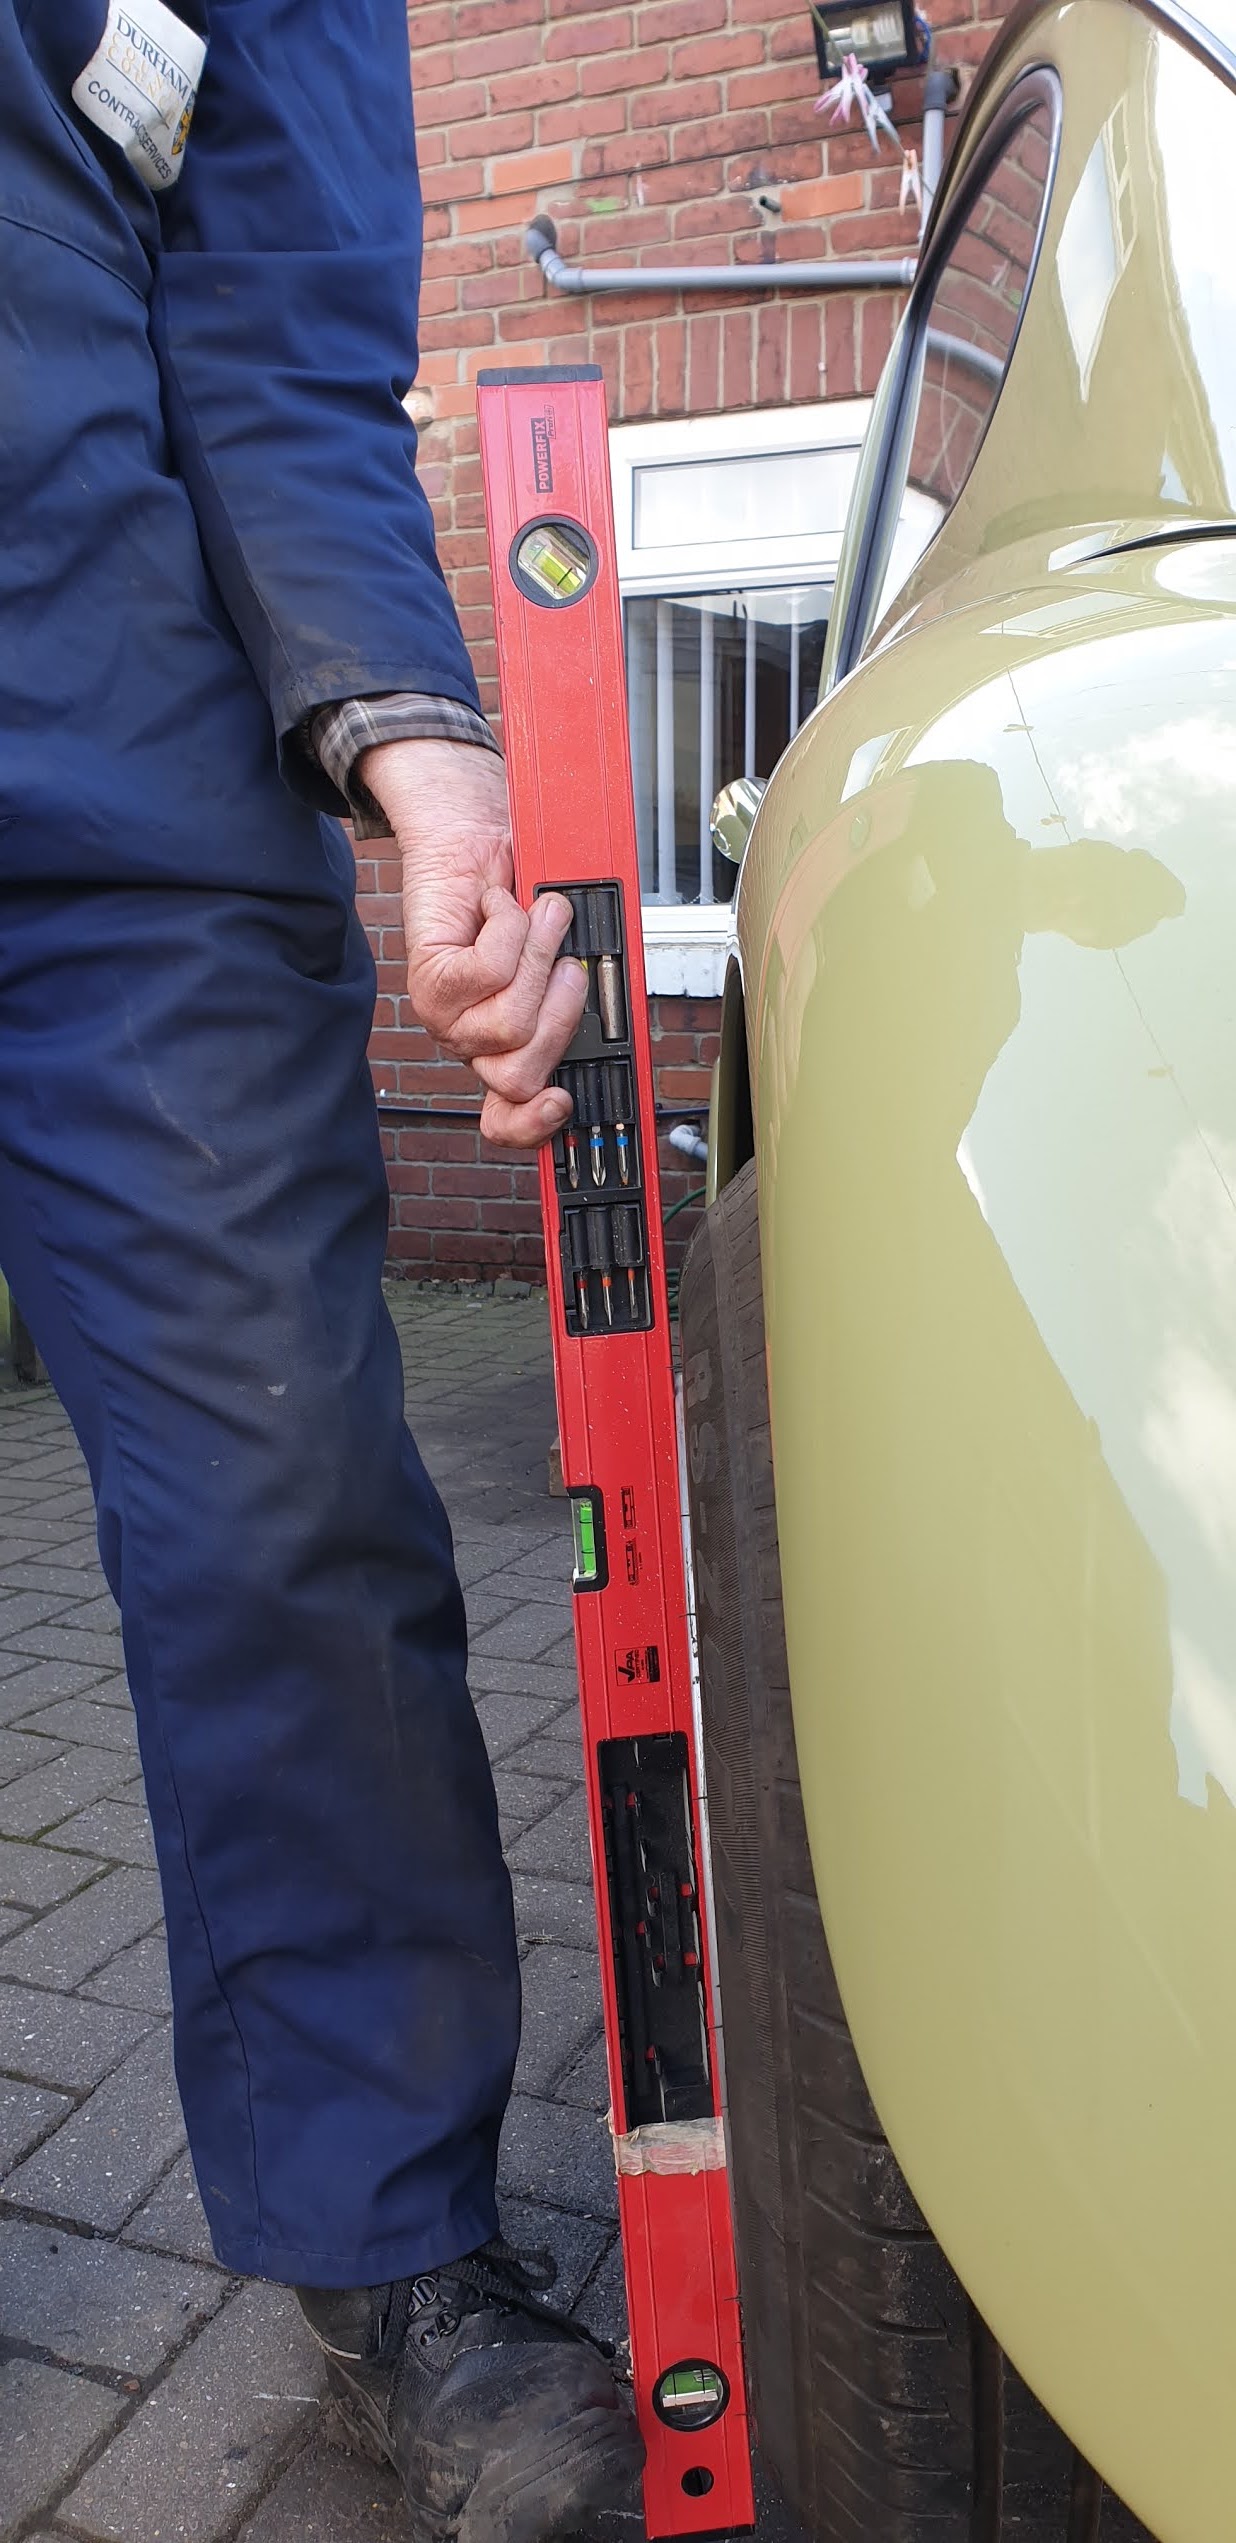
I am so paranoid about Myrtle not sitting level after all my problems last year, so ended up driving to a flat area in a housing estate on the way home and airing her up and down to see if she sat level on a fairly level'ish bit of ground. She appears to be sitting higher than both my dad and I recalled, however when you look under her, she is sitting on her pan so can't exactly go any lower...

Myrtle VW Beetle 65
Paranoid about her leaning

Myrtle VW Beetle 65
Love this wee car, so much still left to do

Myrtle VW Beetle 65
She is soooo cute

Myrtle VW Beetle 65

I drove Myrtle home on what I considered "My air ride settings" and sure enough when we got home she couldn't get over the bloody speed bumps, so I had to reverse and air her right up again.

Upon getting her home and back in our yard my dad said he was just going to dip her petrol tank to see how much petrol was in her, as the gauge hasn't moved in a while. Well it appears Myrtle runs on fresh air as the tank was bone dry, so much, so I don't know how we managed to get all the way back LoL


Saturday 20 March 2021

Well this has kept me busy this week.

     It's a bit of a mixed bag this blog entry...

I am pretty sure many people must be feeling like myself, well the ones who are shielding that is. You know when you have been off work for going on roughly 8 or 9 months I think that's how long it has been, on and off, more off than on. Well you kind of get to a point where you have binge-watched everything on Netflix, Amazon Prime and even Disney. You are fed up reading and there is only so much Facebook you can handle, as it's mostly doom & gloom. So what then?

I mean I have Myrtle my we 65 Bug back, however I have discovered whilst she was away and out of sight, as it were, she was also out of mind, and since her return I have felt really anxious... I know sounds stupid, but I think it's because she still requires loads of work, and it's like I am ploughing money into something that feels like will never be complete.

Myrtle VW Beetle 65
Myrtle I know the rear wheels don't look right just, yet they aren't finished

 
Myrtle 65 Bug
Myrtle is 56 years old this year

I have been out for a few practice drives in myrtle, all very enjoyable, however the clutch is not quite right, so I am waiting to take her back to Bewick Mobility to get her sorted. I can't go for a drive with the fitter until I think it's the 12th of April due to Covid restrictions.

Oh! And whilst I am on about Myrtle I may as well tell you about the new 15 x 8 steel smoothie wheels I bought for her a while ago. I wasn't sure what tyres to go with so rather than go out and guess and buy a new pair, my dad visited one of our local scrapyards and managed to pick up a pair of 195/65/15's for a fiver. The lads up at the General Garage fitted the tyres for my dad for nowt, so a huge thank-you goes to them.


Anyhoo we got the new wheels on, and instantly I could see the passenger side wheel was sticking out further than the drivers side. After much measuring, it seems a theme on this car, and writing a post on the Classic VW Forums we had a kind of plan of attack.

More measuring, told you it was a theme, and we discovered that the rear wings are slightly mismatched. Apparently this is common with 'repo' wings. The passenger side is about 10 mm narrower than the drivers side and making the car look slightly wonky.

Myrtle cannot be bent as since having her tracking set up, again at the General Garage, using a laser alignment gizmo, she drives very straight and does not pull or drift. I am now trying to convince myself that it is just a quirk of Myrtle and I can live with it, however my OCD is really niggling me and fighting me every step of the way.

Ern also cut off Myrtles rear bumps stops, which allows her to sit a lot lower at the rear.

Rear Bumps stops gone

Other things to sort in the short term I think I need a new brake master cylinder as Myrtle's brake pedal keeps dropping to the floor. My dad thought he had fixed the old one as it was sticking, however it now appears as if this maybe the culprit in my brake problem again.

And I am sure sometime ago I must have mentioned Myrtle's wipers, they simply will not 'Park'. You have to manually turn them off at just the right moment. Myrtle has a full brand-new custom wiring loom, so it can't be that, so when my dad and I do the brakes job I am going to remove the wiper motor and get it sent away to get looked at. I have checked on eBay for a recon motor, Wow! They are canny dear like.

Following these bits n bobs this is where I am getting a bit anxious as the next jobs are all big money ones. Things like do I go for a new engine and box, a total respray and then of course she needs a new interior.

Ok enough of Myrtle...

On to my bike, my Specialized Turbo Levo ebike to be exact. A good few weeks ago my bike stopped working correctly, it wouldn't switch on by the top tube button. If I fannied on with the handle bar buttons it would start working, think I have mentioned this in a blog too, dear me I sometime think I am going nuts, it's like ground hog day, anyhoo I digress.

After making a telephone call to Rutland Cycles Nottingham, the place where I had purchased my bike from and trying to get it booked in for what I thought was a warranty claim problem I soon became rather pissed off. Initially I managed to get booked in for an appointment no problem, however my dad informed me he had a hospital appointment on that day, so I had to call Rutland the following day to try and make another appointment. The bloke I spoke to was most unhelpful and was making up all sorts of what appeared excuses. I can understand we are in a lockdown, however my bike is really important to me as it has helped keep me sane.

So firstly he got on about lockdown, then he said a local dealer would fix it. I informed him I had been Intouch with a local dealer who advised me they may charge for any repairs. He then advised I call another local dealer which I did, to be told exactly the same information, that they would charge for repairs. Upon calling Rutland up, this guy still didn't believe me, so he advised me to call the Specialized Concept Store in Harrogate. So that was another call, just to be told the same thing, that they would possibly charge and that there was a 4-week wait before my bike may even be looked at. I then rang Rutland yet again and again was not believed, however did manage to get an appointment for the 17th of March.

Anyhoo long story short I decided the amount of fuel to get down to Nottingham and the chance of being fined for being caught out of area I would just take the bike to Infinity cycles over at Durham. They had my bike 2 days, and it was sorted, free of charge under warranty...result.

As I mentioned earlier and gets me on to my next bit of what has kept me busy this week. I have been watching various things on YouTube. Quite a bit to do with cryptocurrency, however I came across a few videos about Redbubble and t-shirt designs. "Ooh" I thought "I might give this a bit play with".

Redbubble

 A few of my designs LoL

And so this week I have been messing about with various web based design programs and also learning how to do certain things with an old version of Photoshop I have installed. I used to use Photoshop a lot back in the day when I was doing custom CD & DVD covers, but haven't use it in yonks, so I have had to learn by experimenting and watching a few online tutorial videos.

I have to say, although my designs are not exactly professional they have kept me entertained and busy I will be chuffed to bits if I make even one sale. I have 43 designs so far. I would have had more, however a few have been taken down as I inadvertently breached some copyright or other, by using images containing Lego and Star Wars. Oh! And not sure if my classic VW designs are available.


Well that's about it, it's 3:36 am, so another late night. I am on day 498x of cycling today and I have done 2750 sit-ups this month so keeping up with my challenge to cycle another year in support of Arctic ONE. As usual any donations greatly accepted. 

All for Arctic ONE

Not exactly an exciting blog I know, but hey keeping it real, it's just what I am doing at the moment.


Saturday 27 June 2020

Myrtle continues to fight us all the way...

My last post about my wee 1965 VW Beetle Myrtle was back in April, man it feels so long ago and in that time it doesn't actually feel as if my dad and I have actually gotten much further along, however my bank account certainly tells a different story.

No matter what we have done trying to move forward it has been a case of one step forward, then encounter a new related problem and about 5 steps back.

We have run into so many things that I can't possibly recall them all. So although this sounds like a negative story, full of doom and gloom I do have to say and make clear that for me personally, I do still love my wee Bug, and like anything in life, she is a work in progress.

Myrtle is around 55 years old and with adding new bits and bobs to her she was always going to require some kind of modifications. 


Let's start with her suspension, something we have really struggled to get right. So after finally thinking we had everything sorted, a new steering box fitted to remove all the excess play in the old box. A quick steer kit added and the track rods fitted the correct way up. The front shockers in position on the shock locators which are welded in place onto Cage 66 Fabrications extended trailing arms. A homemade steering stop (something I may change at a later date just for aesthetics, even though you cannot really see it and it works) Everything looked spot on.

Home designed steering stop

My dad and I had the fuel tank out so we could peer under the bonnet and see the steering components and shockers etc. Upon airing Myrtle up she was still struggling to lift her driver's side front, even with a lot more psi in that side, so she always looks to be leaning. We re-adjusted the front trailing arms, making sure they were not bolted up too tight and also re-greased the new 4" narrowed beam. Things appeared a little better. Then we went to lower Myrtle, fully airing her out. Now upon measuring her from the driver's to the passenger side, the driver's side was 20mmm lower than the passenger side. Upon closer inspection, it became evident that the track rod was tight up against the body, at the inner wheel arch. This required a little modification to cut a notch. I admit I had to step away at this point as my dad whipped out his reciprocating gizmo and began cutting the inner panel. Job done we tidied the area up as best we could and it doesn't look too bad. At least Myrtle can sit aired out and she is not catching anywhere on the front.


When lowered track rod hitting the inner arch

To avoid the fuel tank catching on the steering bits and pieces I also ordered a really neat tank raise from Eva Resto. A brilliant bit of kit, raising my tank 35mm and with channels down either side, so the wiring can sit neatly nestled away.

Tank sitting on Eva Resto Tank Raise
Next on the agenda was to get Myrtle's wiring sorted. Now, this wasn't a job we were ever going to tackle really, but after a lot of consideration and during working on Myrtle finding a few burnt wires I asked my dad "how big a job is it? and do you think "WE" as in...ahem! Ern, can we do it ourselves". You see I am useless when it comes to most things, but especially wiring, I don't even know how to wire a plug up...well I mean they come pre-fitted now anyhoo.
 

Much research was done upon the interwebs at this point and I eventually came across a guy who I discovered had a really good reputation and knew his stuff. Yes, the wiring was going to cost a little more than I first thought, however after speaking to Iain Burns over at Aircooled Auto Elec the complete loom he could make up and provide became a no brainer.

Aircooled Auto Elec Top Quality and Iain Burns Topman

20 Blade fuse box, now everything is isolated and independent
Iain was spot on and our communications both over the phone and using Whatsapp within a few days resulted in me having a modern 20 Blade Fuse Box, complete with custom wiring loom that had everything included to run all my electrical needs. So things like my dual compressors and ECU for my Air Ride set- up. Safety relay for my electric fuel pump. Separate power for my soon to be fitted auto clutch adaption. A spur for our modified electric wiper switch. Oh and also included within the loom a plug with accompanying wires for an alarm system I had purchased. There was even an accessory USB that I can fit in my glovebox.

I removed a spare toggle switch from under the dash and made a bracket for the alarm LED

Alarm LED which is super bright
Wiring so much neater
Rear-end a lot neater thanks to the wiring loom
Iain integrated the alarm wiring into the loom
Ern testing plug when he went to fit the alarm
One problem we did encounter upon fitting the 20 blade Fuse box was that the fuse box was not accessible when the Air Ride Cradle was in place, so we had to modify the cradle somewhat.

This area covered the new fuse box

Once trimmed we can now access the fuses when installed
Anyhoo I have to give a huge shout out to Iain as he went out of his way to help us throughout the fitting of the new loom and the loom itself is top-notch pure quality. The icing on the cake for me was when I actually got to have a working interior light, as this was one of my first purchases believe it or not when I bought Myrtle over a year ago and started this journey.


Well chuffed with interior light
Again doing a lot of research I had originally planned on fitting LED Headlights to Myrtle. However, upon reading about the cheaper lights available upon the likes of Amazon and eBay I discovered that although they can look pretty cool, the cheaper Chinese made lights throw off terrible beam patterns. Apparently, it's all to do with where the "hot spot" of the light is produced.

So I decided to opt for replacing the headlight and sidelight bulbs themselves and found some replacement LED bulbs over at Classic Car LEDs.  This meant I could retain my old classic reflectors and light housing. I have to say I am impressed with the brighter light, far better than the old yellow dull candle-like glow. I also have some nice shiny stainless steel headlight surrounds to go on as the old chrome ones look a bit pitted.

LED Headlight Bulbs
Installed, proper easy job
Bulbs
LED's all around

Loving the much brighter rear LED's
As mentioned earlier we had the fuel tank removed from Myrtle and it was at this point whilst trying to find somewhere to place the alarm siren Ern decided he didn't like the look of the old brake pipes and the way they were routed. So he decided he was going to remove them. We had taken the Compressors and manifold out upon the air ride cradle to finish off the wiring so this was the ideal time to replace the brake pipes at this point.


New brake pipes installed along with Eva Resto Tank Raise
Upon removing the pipes, my dad having to cut them, we tried our best to mop up and wash off any brake fluid, however, it was inevitable some would get on my paintwork. Some paint was already flaking in the area where the brake fluid reservoir is situated on the inner wing. I came down the next morning after my dad had fitted the new pipes and discovered a large area of flaked and blistered paint. It looked bloody awful. So the next couple of days were spent trying to do a spot repair under the bonnet. Myrtle is never going to be a show winner, but the repair looks ok and at least it should protect her. To be fair she now looks better than before as like I say her paint was blistered in a similar area.


Not too bad a spot repair
Upon removing and then replacing the fuel tank and the inline fuel filter, and the pipes from brake reservoir some fluid must have spilt and have gotten on my small alarm siren as the dam plastic bracket snapped clean off. This meant I had to go Googling for a new Alarm Siren and we decided to mount it in a different position out the way. I now have a new funky sounding alarm sound.

Myrtle's wiring all complete and everything working. Ern fitted a small micro switch to the internal wiper switch so that when the plunger was pressed it would contact and the new electric wiper pump would activate and in turn spray water onto Myrtle's screen. A cool little mod which keeps the original appearance of the car. I saw the idea for the mod on the Samba Forums. Mind you Ern did mislay the small plunger and I was gutted that a new one cost me almost £20 inc p+p

Inside Myrtle is practically gutted. I had bought some interior ply door card templates from eBay. I think they were about £40, they are about 3mm thick and a right pain in the arse to get clipped in. I am hoping when the time comes to get Myrtle's interior trimming done these will help out. Her old cards must have got wet at some point and they were looking a bit worse for wear.


Hopefully can trim these as they are thicker than standard cards.
Myrtle already had some soundproofing inside, but I decided to buy a soundproofing kit from Car Insulation.co.uk I got a full classic Beetle kit and also bought some Large Sheets of PeaceMAT XR Car Sound Deadening Material. I have since placed in the PeaceMat, selecting areas to give me good coverage combing the old deadening material with the new. Once I finally decide on what my rug options are I can sort out the rest of the soundproofing kit I got which looks to be good stuff.
     
Pretty easy to apply this sound deadening

A lot of Myrtle pre-covered so just filling in areas
In reality, having Myrtle to tinker on with has been great during the lockdown, it's filled in a great deal of time for both my dad and myself.

A Little Rat Fink Action
Ern had been looking for little jobs to be getting on with. I found him just last week replacing the fuel line and in making a heat shield to protect the line from where it comes out of the electric fuel pump. The pump being situated on the rear axle. The fuel line appears quite close to my passenger side J Tube.

Whoever had Myrtle in a previous life did a great job in making a removable panel over her gearbox. it just makes getting to the starter and rear of the engine area and top of the gearbox so much easier.


It really helps to have this removable panel

New Fuel line in, Ern has made a heat shield, not in picture as the fuel line is close to J Tube
I had always had a plan to do a front disc conversion on Myrtle so ordered up a CB Performance front brake conversion kit from Limebug. This included all the necessary parts and I opted for the kit with the 2 1/2" dropped spindles. 

Myrtle already has dropped spindles fitted, but my thinking in looking at the CB Performace versions is that the brake callipers actually look to mount directly to the spindles, rather than a separate bracket that goes onto the beam. I may be wrong here as I just went off online images. 

Upon further reading about the brake disc conversion, I discovered that the hubs/rotors come pre-installed with studs. So what this would mean is having wheel nuts on the front and wheel bolts to the rear. I really wanted everything to be the same so it was at this point I started looking around for press in studs to put into the rear drums. I will get back to that bit in a moment.


As Myrtle was starting to take shape, her wiring looking all nice and neat, plus I had also tidied up her engine bay, having bought a new pulley tin and having it modified at a local metal fabricator to fill in a small hole (something only the eagle-eyed and purists will spot I am guessing) Then, of course, painting it Dolphin Grey to match the other tinware.

I would really have liked to remove the engine and get all new tinware, getting rid of the fan shroud heater pipes etc. But hey that's maybe for the future. We also fitted a new Crank Pulley bolt as the one that came with the MST kit kept coming undone. Oh and whilst I am talking about the back end of Myrtle upon going to start her a couple of weeks ago it appears her electronic ignition had just decided to die, so we have had to resort to going back to points for the time being.

Saying which I have a brand new Magnaspark II Billet Distributor, new 8mm HT leads and a Magnaspark coil. I am just awaiting a fuel block off cover with integrated coil mount to arrive from Aircooled Hut.

New Tin seal and engine area looking pretty clean

Just awaiting Fuel Pump Block-off and coil mount.
I figured the time had now come to get some new wheels. Now as we all know wheels are a major decision on a car, they can make or break a car. And again you have guessed it a whole lot of research. I just could not find a set of 17" inch wheels that came in anything but 7" inches wide. Now I knew 17"' s would fit as I had seen them online on other peoples cars, however, this is the fatal mistake many of us make. It is not so much that they will fit, it is how do you make them fit. I can tell you now from personal experience it can be a very expensive and frustrating process, one I am going through at the moment, as I will explain. 

JBW 7.0x17 SMA Wheels
So I firstly got my eye on a lovely set of 7.0 x 17 Radars. I had seen a Bug in the FastCar magazine and it looked sweet. Upon reading about the car it stated the guy was running a 4" narrowed beam. "Great," I thought the same as me. I then read that the wheels apparently were 7.5 inches wide, this couldn't be right as far as I was aware they only came in a 7" wide fitment on a 17. Not only that this guy who was some sort of an engineer with all the gear and know-how had actually narrowed his wheels to get the best fitment.

I then got my eyes on another Bug online at Volxzone. Upon reading about this car the guy had the 7.0x17 JBW SMA wheels, but he was running a 6" narrowed beam. I have just recently bought and had fitted a 4" beam so this really wasn't a route I wanted to go down, and this is where no matter how much research you do when you want something and start imagining it in your head you make stupid decisions.

So this is what was going on inside my head "Oh I'll just order some 7.0x17's JBW SMA's. I know I'll pop 185 tyres on the front, they are bound to fit". And so I spoke to a very helpful gentleman named David over at R&R Alloys. David went through the process of measuring for poke and offset to check for clearance. He was spot on in his communications and even though the JBW SMA wheels were not advertised upon his website he managed to get both the wheels and tyres in stock within about a week. 

Just a note as these wheels were not a standard size fitment that is the reason I have encountered problems. David and R&R Alloys were spot on and a real pleasure to do business with. They were very helpful and something I  really appreciated was there was no sales pressure. That for me is very important in any dealings. I hate it when you call somewhere and are made to feel like just another punter. Once I get things sorted I have promised to get back in touch with David as he took a genuine interest in Myrtle.

I am guessing you may have an inkling as to what happened next. Yes, it was that "Dun, dun dun" moment, as I excitedly unboxed my brand spanking, amazing looking wheels. Myrtle was up on axle stands, aired out so her rear suspension was at it's maximum for height. I went to put one of the new wheels on the rear, placing it up against the drum and "Errrr what", it wouldn't sit straight. On closer inspection, the rim was actually hitting the rear bump stop. Bloody hell, nowt ever just fits.

I came back in the house and began searching to see if other people had experienced this problem. Sure enough, as Myrtle is a 65 with short axles I was going to need 1" spacers, obviously I had not researched enough. So onto Limebugs page and a couple of spacers ordered. Oh and this is where I also go back to the wheel studs.


So with having to fit a 1" wheel spacer, plus the wheel and then take into consideration the length of how much the stud would go into the drum, my dad and I had to measure everything. It turned out that a press in stud would fit approx 9mm into the drum. The spacer was 25mm or 1" inch and the wheel itself at the hub is also 25mm, so that was 65mm in total approximately.
 

Checking the internet Honda studs appeared as if the would fit. They are 12mm with a 1.5mm threaded pitch and the knurled area is just about spot on. I ordered 10 of these Evo Corse Spline Wheel Hub Stud M12X1,5 67mm For Honda from Motorsport-Tools.com.

Again more research on The Samba Forums and my dad ordered a 10.20 mm drill bit. Once everything had arrived including new wheel nuts from John Brown Wheels, we set about drilling the drums and my dad took the drums and studs over to a local garage who were kind enough to allow him to use their press to press in the studs.

 
Once the spacers arrived from Limebug we again test fitted one of the rear wheels, which was fitted with 205/40/17 tyre. This time the wheel went on no problem, with just enough clearance. You have to remember that actually, Myrtle would probably never be at her maximum suspension range, as we still had he on axle stands and her rear suspension hanging freely. What we then did was pop a jack under her rear suspension on the side we were working on and jacked it up as if Myrtle was being lowered, so pushing the wheel up into her inner arch. The wheel/tyre eventually caught the inner body, as I would expect, however, this would be in a position when she was sitting pretty low when fully aired out. So it looks like we had sorted the rear end.

Moving onto the front end and so the nightmare that is cars and wheels began.
I may as well just say from the off 7.0 x 17's on a 4" narrowed beam running either 185/35/17 or 205/40/17's and air ride do not fit. 


Oh and another side note for me I absolutely hated the look of the 185/35/17 on the 7" wide rim. Obviously, the tyre was stretched, something that totally went over my head when I ordered the setup. By this I mean the outside edge of the alloy rim was protruding somewhat all the way around. I know some people like the look, but for me it's a Big fat NO.  

Many people have commented and said this fitment actually works, but I think when they are comparing one car to another it is where one car is statically lowered and a choice is made between being low enough for clearance and looks. Whereas a car that is on air which has the potential to go much lower, if you run the wrong setup it kind of defeats the point of having air ride on in the first place. 

Now I am obviously not a professional in this so just speaking from my own experience. If you read this it may help you if you are thinking of going down this route. What I would say is do a lot of research and if at all possible borrow wheels off one of your mates to do a test fit. As I am socially inept and have no friends I have no one to call upon so I have to rely on spending huge amounts of money and learn by making mistakes.

Loving the look of the SMA's on the back
Gutted front wheels don't fit

SMA's retain a classic look
Ok so with the wheel on the front, when turning full lock to the Left the tyre was catching the pan of the car just where the inner wheel arch is and upon turning hard-Left the rim/tyre was catching the front beam, just about where the trailing arms attach...

We even tried popping the 1" inch spacer on the front, this helped with the catching of the pan and beam, the wheel just say catching the beam on full lock, however upon going to air Myrtle out with her now having a much wider track the new wheels/tyres ended up being pressed hard up against the outer edges of the front wings. I couldn't actually air her all the way out otherwise it may have ripped her wings off or at least bent and damaged them.

Next thought "Omg, omg, omg" followed by a string of obscenities, followed closely by putting all wheels away, going upstairs to my room, throwing my leg off and taking refuge under my duvet. Hey, we all react in different ways.


After a stressful and frustrating few hours of hiding, I eventually emerged to discuss options with good Ole Ern. Although my dad and I can sometimes go hammer and tongs at one another, I know he always has my best interests at heart. We kind of agreed at this point it's not a money thing as I mean I have chucked so much at this little car over the last year just quitting isn't even an option.

So plan of attack we figured I had 3 options.

First... sell brand new wheels second hand and take a loss and just run her with standard steels which was not the vision I had for Myrtle.

Second... chance buying a 6" narrowed beam which would cost me another £850 or so, then remove the 4" beam and try and sell it second hand. This option requires a lot of work, plus no guarantees and after reading about 6" beams and steering kind of put me off.

Third... and something I had investigated even before I had bought these wheels, get the wheels narrowed professionally.

And I think I am going to end there and will add another update when we have solved this latest problem

PS anyone want to but some Nankang NS-20 185/35/17's brand new with labels still attached?