Well we have finally got around to fitting the bigger brake mod to Grandma, my 2013 Volkswagen Beetle GSR, which happens to be #240 of a production run of 3500 worldwide. Of those 3500 cars produced only 100 were brought to the UK. Of that 100, there were 70 Yellow and Black's and only 30 Platinum Grey and Blacks, so Grandma I suppose is quite a rare car, plus Volkswagen are no longer making the Beetle, so she may become a bit of a collector's car.
Grandma is now 9 years old, approaching ten, and she is in canny good nick. Stone chips are my biggest annoyance with her, but hey, show me a car without the odd bit of road rash after 10 years. She still turns a few heads, and I think quite a few people get a surprise at just how pokey she is. When I bought her, she was remapped, with a Revo stage 1, and pushing out 264 Bhp. I then got her remapped to a stage 2, along with the Race Cat and DSG gearbox map, so she is now pushing out 290.6 Bhp. Grandma is also running a Revo cold air intake and a Miltek unresonated Cat back exhaust, which sounds pretty good, however can get on your tits when travelling between 50'ish to 60'ish as it drones, so much so at times it makes my ears go funny. The DSG mod is quite fun as when you boot Grandma she has a sort of fart when chaging gears in sport mode Lol.
Anyhoo moving along I will now give you a run down of the brake mod with as much detail as I can, who knows it may help someone out there if, like me, you run into a few teething problems with mixing and matching bits of gear. I will write a complete list at the end for reference purposes, so you can skip to there if you don't want to read my blog... Shame on you, Lol.
OK so the 2013 VW Beetle I think is based on the Mk 6 Golf chassis. I am sure this is correct as I recall the Miltek Cat back system as being off a Mk 6 Golf and also the Revo 200 cell Race Cat from a Golf Mk 6 fitted when i had it fitted down at BTG Performance. Following much research and still being a little unsure, of what exactly would fit, I just decided to bite the bullet and purchase a pair of MK 7 Golf R front calipers, which I got from Flea Bay. They came complete with the carriers and the R badge side plates. I opted for all black to go with my stealth theme.
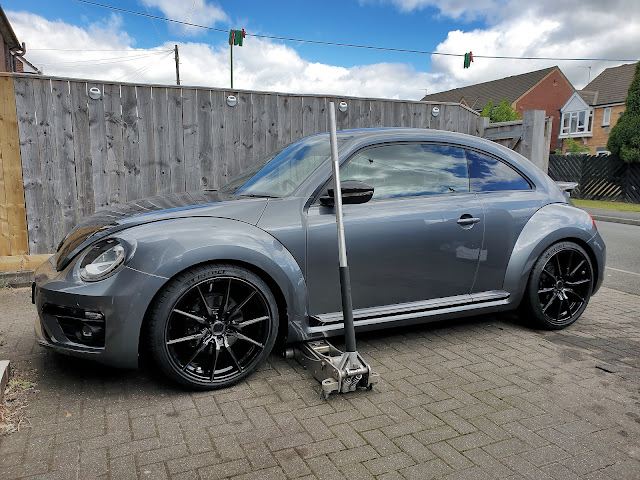 |
| Grandma about to be elevated |
 |
| Had her 4 years now and still love her |
I then did a little more research and discovered that MK 5 Golf R32 rear calipers would fit, so again visited Flea Bay and bought myself a pair of these. I was gutted to discover, after I had purchased the calipers, that they didn't come complete with carriers, so that was a costly error. I had to order the TRW carriers separately. Oh! And if you have A VW Beetle you will no doubt know that the car does not have an electric handbrake like on most newer models, so the R32 are ideal as they have a mechanical handbrake.
 |
| Had these sitting around for ages |
Next on the shopping list were EBC Rotors/Discs and pads. I went for grooved and dimpled. The GSR and I think Turbo Beetles have 288 mm Fronts and 272 mm rears. With the Bigger brake mod, I am now running 340 mm Fronts and 310 mm rears. It doesn't really show up well in the images I took, however the bigger brakes now look more at home when looking through my Concaver CR4 20-inch alloy wheels.
 |
| Fronts look a lot bigger |
One of the most difficult problems to solve, believe it or not, was in which brake lines to order. As mentioned, I believe my car is based on a Mk 6 Golf chassis, however with having Mk 7 Golf R front calipers and MK 5 R32 rears, I wasn't sure which lines to go for. I ended up ordering a complete 4 line kit from EBC for a Mk 6 Golf, and when they arrived it was obvious they were not going to fit. So again after much research online and not really finding an answer as all the images at stockists were actually generic ones, I decided to risk getting a set of Mk 5 Golf GTI Lines. Yay! Second time around and the lines are spot on.
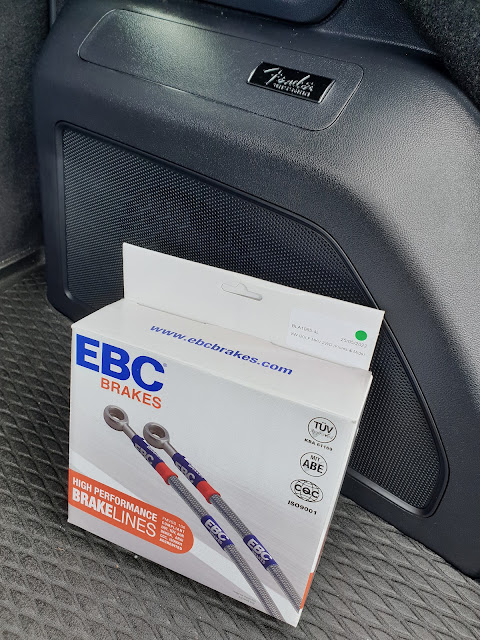 |
| EBC Braided Lines |
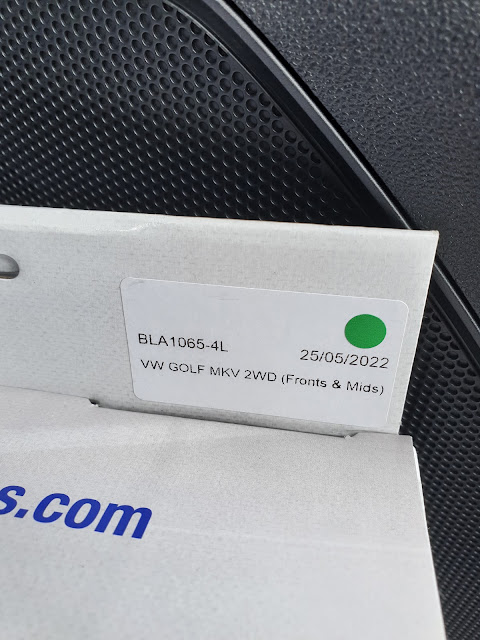 |
| EBC Part Number for lines |
 |
| EBC Braided Lines |
Next images are basically of strip down and build up... on Day 1 and fitting the front set up of the Golf Mk 7 R Backplates/splash guards/hangers/calipers/pads and rotors, plus braided lines.
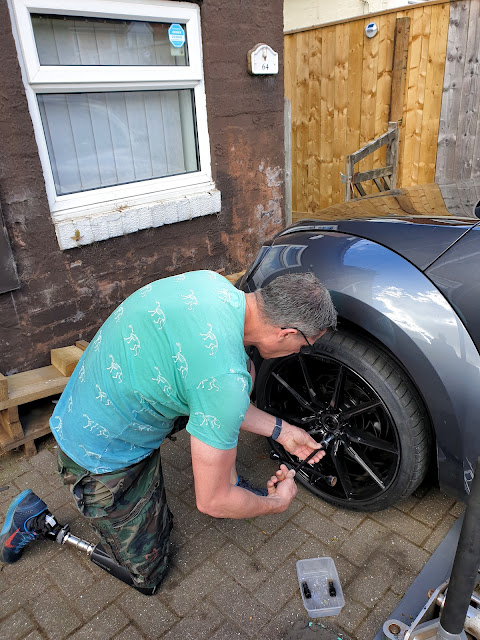 |
| Removing the wheel bolts |
 |
| Lifting my wheel off, being careful not to ding it |
 |
| Not long since I put these discs on |
 |
| The original calipers and the EBC discs I popped on not long ago |
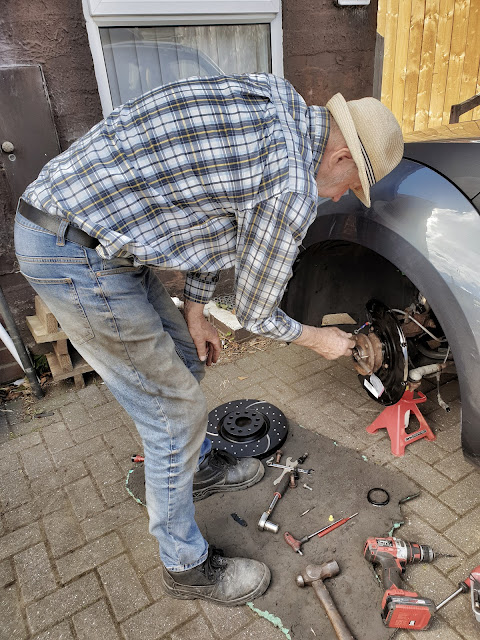 |
| Ern cleaning the threads for disc as a bolt had been snapped in |
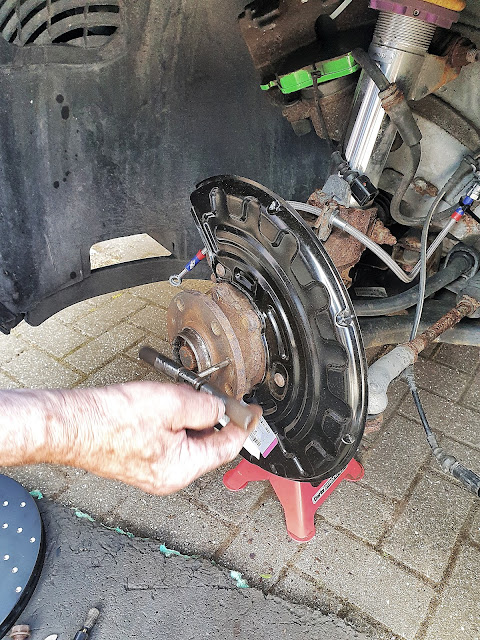 |
| Using a tap to clean the threads |
 |
| Larger Splash Guards |
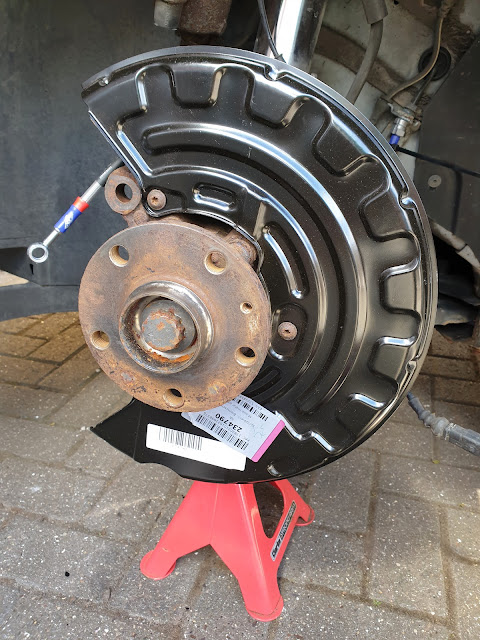 |
| Larger splash guard fitted |
 |
| New Larger Rotor Fitted |
 |
| Hanger and pads fitted |
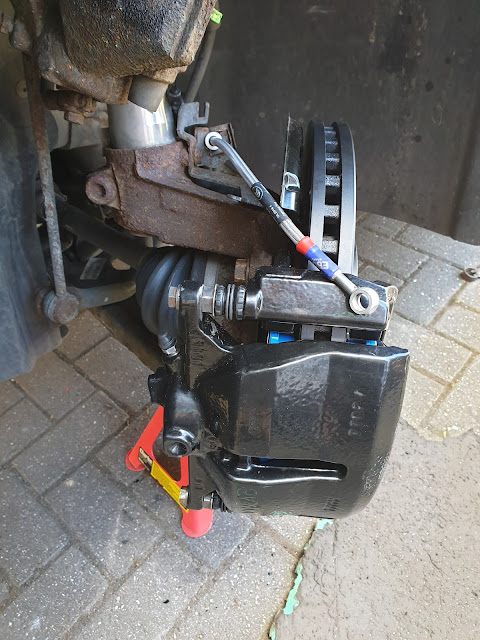 |
| Larger Golf MK 7 R calipers fitted |
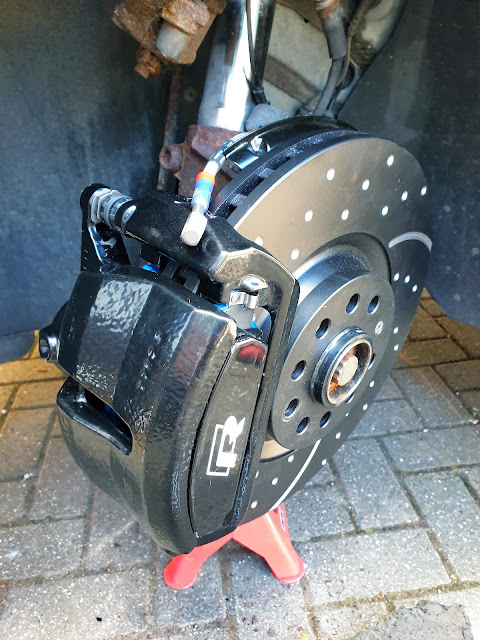 |
| Calipers look the business |
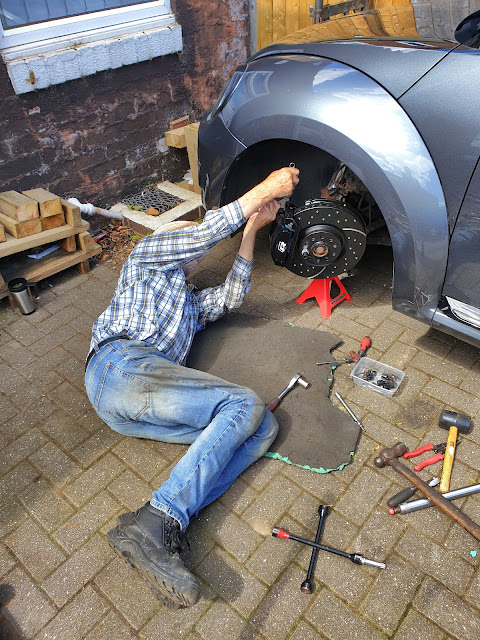 |
| Ern inspecting the fit |
 |
| Banjo on one end and a female adaptor on the other |
 |
| Bleeding the brakes off |
 |
| Still not sure if I like the look of these rims |
 |
| Concaver CR4 20-inch rims |
All in all, fitting the front larger brake components was a pretty straight forward job. No modifications needed other than providing the mix and match brake components. No problems with any warning lights for Abs, and the brake pad sensor didn't require cutting and rewiring to fit, just plug and play. Basically it is just a straight swap. One thing to consider I guess is that I am using 20 inch rims, I haven't popped my old original Tornado wheels on, which are 19's to see if there is enough cleearance. I think there should be like.
Day 2 Fitting the Rear Golf Mk 5 R32 Rear components
Day 2 has been a bit more of a fanny on. When I got up this morning, I opened up the large cardboard box containing my Golf Mk5 R32 rotors/discs and pads. Upon inspecting the new EBC Blue stuff pads and placing them into the brake carriers, I could see something wasn't quite right. The pads did not come with any retainers, so were rattling around inside the carriers. Obviously as this was a different set-up to the original and at the time I wasn't aware I needed retainers, as they did not come supplied from EBC with the pads, this meant more research online.
Upon visiting EBC Direct I could see I had ordered the correct size Discs/rotors as they were 310 mm, the earlier Mk 4 only having smaller 256 mm discs/rotors. Again, at this point I wasn't aware of the retainers, not until I checked the rear calipers online. You have to remember I had bought the calipers a couple of years ago, and just really got around to purchasing the new discs and pads, plus lines. My other old classic bug, Myrtle had been eating my money LoL.
I was now panicking a little thinking "Awww crap I have bough the wrong calipers". Anyhoo eventually my dad and I discovered a break-down schematic of components and realised that we would need some brake pad retainers, so we drove down to Pullman VW at the Arnison Centre in Durham, taking a rear pad and a caliper carrier. The friendly parts guy, checked on his computer and was able to tell me that the pads and carrier were off a 2007 Golf R32, and he would be able to order me the retainers no probs. They were just over 3 quid each, and I required 4. Just had to wait for them to arrive in to stock. I can pick them up on Saturday morning.
 |
| Golf R32 Rear pad retainers |
Ern and I drove back home and started stripping Grandma's rear brakes down, or should I say attempted too. Next on the problematic list was to come. This was when we went to try and remove the original brake caliper carriers. The 4 studs holding the carriers in place were splined torque bolts, 14 mm. My dad didn't have a 14 mm, so he popped up to our local motor factors, Fred's and bought a complete set of torque bits ranging from an M16 down to a M4. Job sorted, or so we thought. The bottom stud came out fairly easy on the carrier, however the top stud, well it was very difficult to get a torque socket on, along with a ratchet or bar. You see there is a cross member which runs under the car and this limits the room for getting the socket and ratchet in place.
My dad had to MacGyver a 1/2 inch ratchet adaptor, cutting it with a grinder, so it was short enough when fitted in the torque socket, that we could get a spanner on, between the stud and the cross member. We both then had a go at pulling on an adjustable spanner to try and loosen the stud, with the help of a few taps of a hammer. Fortunately, the studs were not rock solid, as upon reading online about them, they can be a right bar steward to remove.
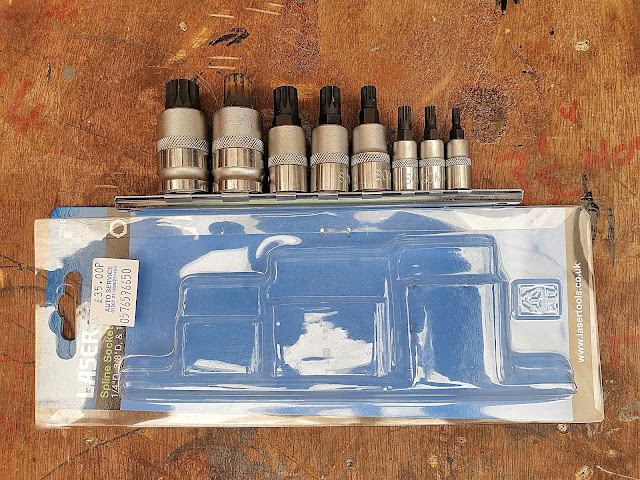 |
| Torque Bits |
 |
| Ern on with Grandma |
 |
| Rear Brakes originals |
 |
| M14 Torque bolt hard to get at because of cross member |
Once the calipers and carriers were removed, remembering to pinch off the brake lines, the next job was removing the backplates/splash guards. The four studs came out easy enough, however the backplates don't have a gap to slide them in around the rear of the stub axle. In order to fit them, you have to remove the stub axle.
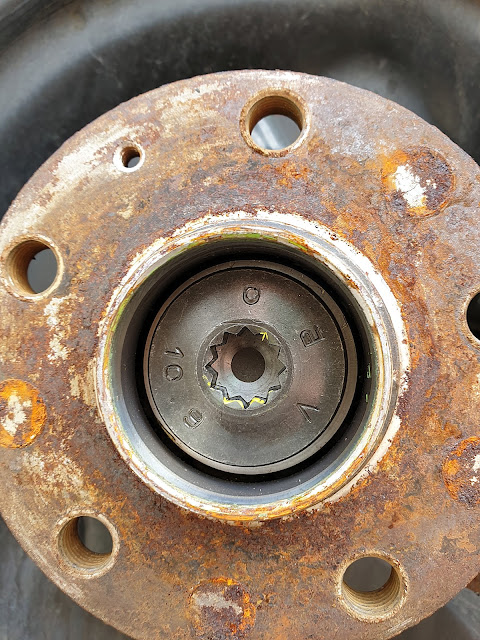 |
| Stub axle stud M18 |
No worries a tap with a hammer and chisel to remove the stub axle caps, and this is where we were presented with our next challenge. You know that torque bit set I had just bought earlier? Yes the one that goes up to M16, well guess what the stub axle stud is an M18, for Feck’s sake LoL
 |
| M18 Torque Bit/Splined socket |
Now awaiting an M18 torque bit arriving from Amazon, so the job has been suspended once again.
New rear discs look huge compared to the originals... Plus they are vented...
 |
| New versus Old |
Day 3
Couldn't really get on today as we were waiting for the Postman to deliver the M18 torque bit, so early this morning I went and got my hair cut, then when I came back Ern and I popped down to Pullman VW to collect the pad retainers.
When we got home I suggested carrying on with odd jobs in our front garden, as we have been on trying to sort it. Next on the agenda was giving the front garden hedge a serious trim, so I set about that with a little bit help from my dad, man it was hot today so I had to keep popping in the house to cool off. I am not good with too much sun. As we kept busy in the garden it soon turned to mid afternoon and the Postie came up the path and delivered the torque socket we had been waiting for.
 |
| I slackened it for him...Honest |
Ern and I were then able to remove the rear hubs and I also removed the old back plates/splash gaurds. Following this I used used a wire brush in the small rechargable drill and cleaned as much as I could around the suspension arms and anywhere I could see rust. I then gave all the bits and bobs that I could get to a coating of Kurust. Next thing to do was pop the new larger splash gaurds on, they mount in exactly the same 4 holes with torque studs.
 |
| M18 torque bit |
 |
| Hub came off easy |
 |
| Mk 6 Golf Splah Gaurds |
The old hubs, which are complete with bearings came off no problem once the M18 torque stud had been removed. Before putting them back on we needed to find a torque setting, as these studs are supposed to be torqued real tight and to the correct setting. As we began checking out the interwebs for torque settings, we came across a YouTube video, which was for a Golf. The guy in the video stated you should never just put the old hub studs back in, but should instead get new ones. So we began looking for the hub torque studs, as we did this we came across a few complete kits. A single kit contains a new hub, the M18 torque stud and the small hub centre cap. As Grandma was stripped I decided to buy two complete hub kits. My dad rang Europarts and they had a couple in stock, so we went down to get them, and that is just about Day 3.
Not sure when I will be commenting on Day 4 as I am back to work, but at least I think we have everything we need to complete the larger rear brake upgrade.
I popped the rear splash guard and rotor on just o see what they looked like. Difficult to see in the images but these discs are much bigger and chunkier, plus nthey are vented.
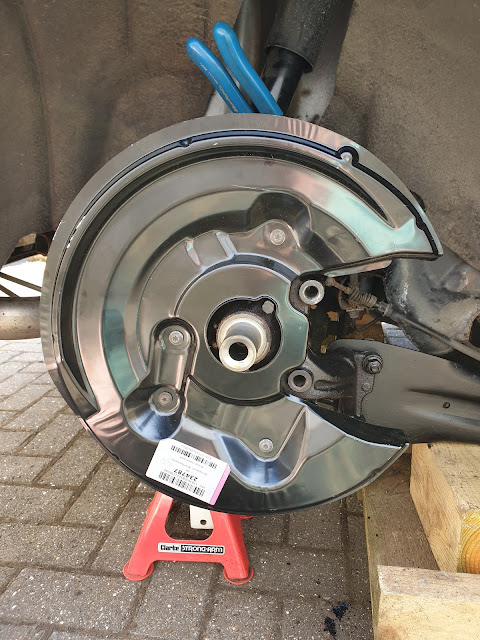 |
| New larger back plate |
 |
| Test fit to see how they look |
Day 4...
Well it is actually Day 5 as the hubs we recieved from Europarts were the wrong ones. They supplied 30 mm hubs when Grandma actually runs 32 mm ones. I was at work Sunday and as I arrived home in Tango my little Smart car there was a horrible burning smell coming from her, plus a canny bit of smoke. After leaving her for a while then checking her oil and water, which were all at the levels they should be I went to start her and apart from a little groan she just would not start. I tyhink her engine is buggered. My dad has managed to pop a socket and wrench on her and turn her over by hand so the engine is not completley seized, however she is still too poorly to drive. Proper fed up as had just managed to get my Bank Loan suared up and now it looks like I may have to get ticked up for another car that I can use for work.
Anyhoo Day 4 or was it 5. Ern has completed the installation of the rear hubs, rotors, calipers and pads and fastened up the new braided brake lines. He has torqued up the hub bolt to the recommended spec. All we need to do now is make sure the brake carriers are torqued up, which means raising Grandma a little higher so that we can get a good pull on the torque wrench. Then it is a case of bleeding the rear brakes and possibly having to remove the centre console to gain access to the handbrake cable adjuster inside of Grandma.
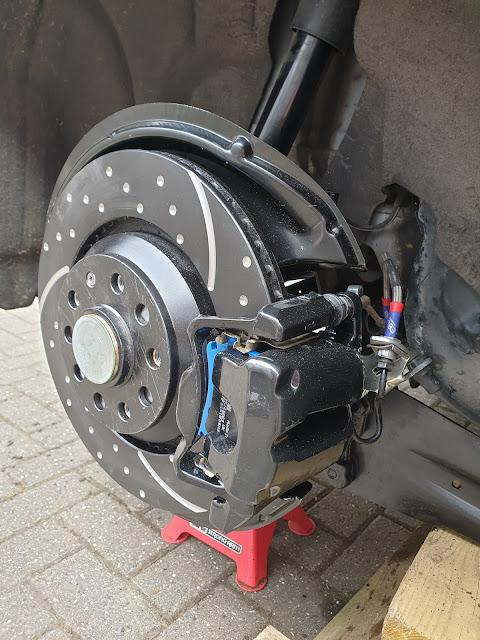 |
| R32 rear calipers and rotors |
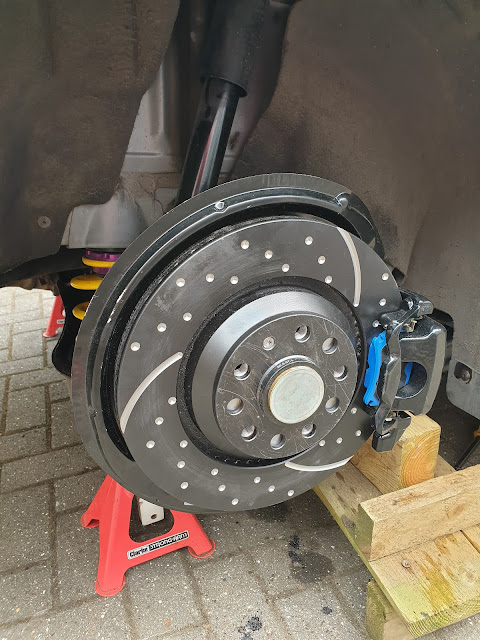 |
| These should do the trick and look pretty cool |
Finally I will fit her wheels back on and following this give her a wash and polish as she is all dusty and has cobwebs hanging off her.
These images don't really do the look of the brakes/wheels justice, as before with the other standard sized discs when peering through the wheels they looked puny.
Parts List
Volkswagen Golf R Mk 7 Front Calipers & Carriers
Volkswagen Golf R32 Mk 5 Rear Calipers & Carriers.
EBC 345 mm Golf R Mk 7 Front Discs Grooved/Dimpled + Pads
Part Number Front Discs GD1877
Part Number Front Pads DP52127NDX
EBC 310 mm Golf R 32 Mk 5 Rear Discs Grooved/Dimpled + Pads
Part Number Rear Discs GD1416
Part Number Rear Pads DP51518NDX
EBC Braided Brake Lines, set of 4 VW Golf Mk 5 - Fronts Banjo/Female fitting with adaptor for horse shoe clip. Rears Female/Female.
Part Number BLA1065-4L
Splash Panel/Brake disc the fronts are from a Golf Mk 6
Part Number from Autodoc being 234791 & 234790
The Rear Splash Panels/Brake Discs Rears from a VW Golf Mk 6
Part Number from Autodoc being 234787 & 234786
M18, M16 Torque bit/splined socket. For rear carriers and stub axle.
32mm rear hub kit to fit a 2013 VW Beetle
Oh and don't forget the rear pad retainers, not sure of Part number, however your local VW dealer can order these up as long as you identify the caliper/pad. Best to just take them to your friendly dealer who will sort you out.
I also went out and bought a bottle of brake and clutch fluid, as you will need to bleed your brakes following disconnecting and reconnecting of your lines. Oh! And make sure you feed your lines back in the same way you removed them. I forgot and fed the Pad sensor wire under my newly fitted brake line. It's just a fanny on, as you don't want to be taking the line back off again after you have bled your brakes. Ern (my dad) removed the switch to reroute it rather than remove the brake line again.
A huge thank you to my dad. I am no mechanic and he always keeps me right, plus he is brilliant at problem solving. My dad continues to amaze me, as can be seen in some of my pictures. Almost 82 years old and lying under a car, fettling it.
No comments:
Post a Comment
Thank You for your Comments I really appreciate your time and feedback.